Update May 15, A late start to the season

Thought I would catch up with all the going ons of this winter.

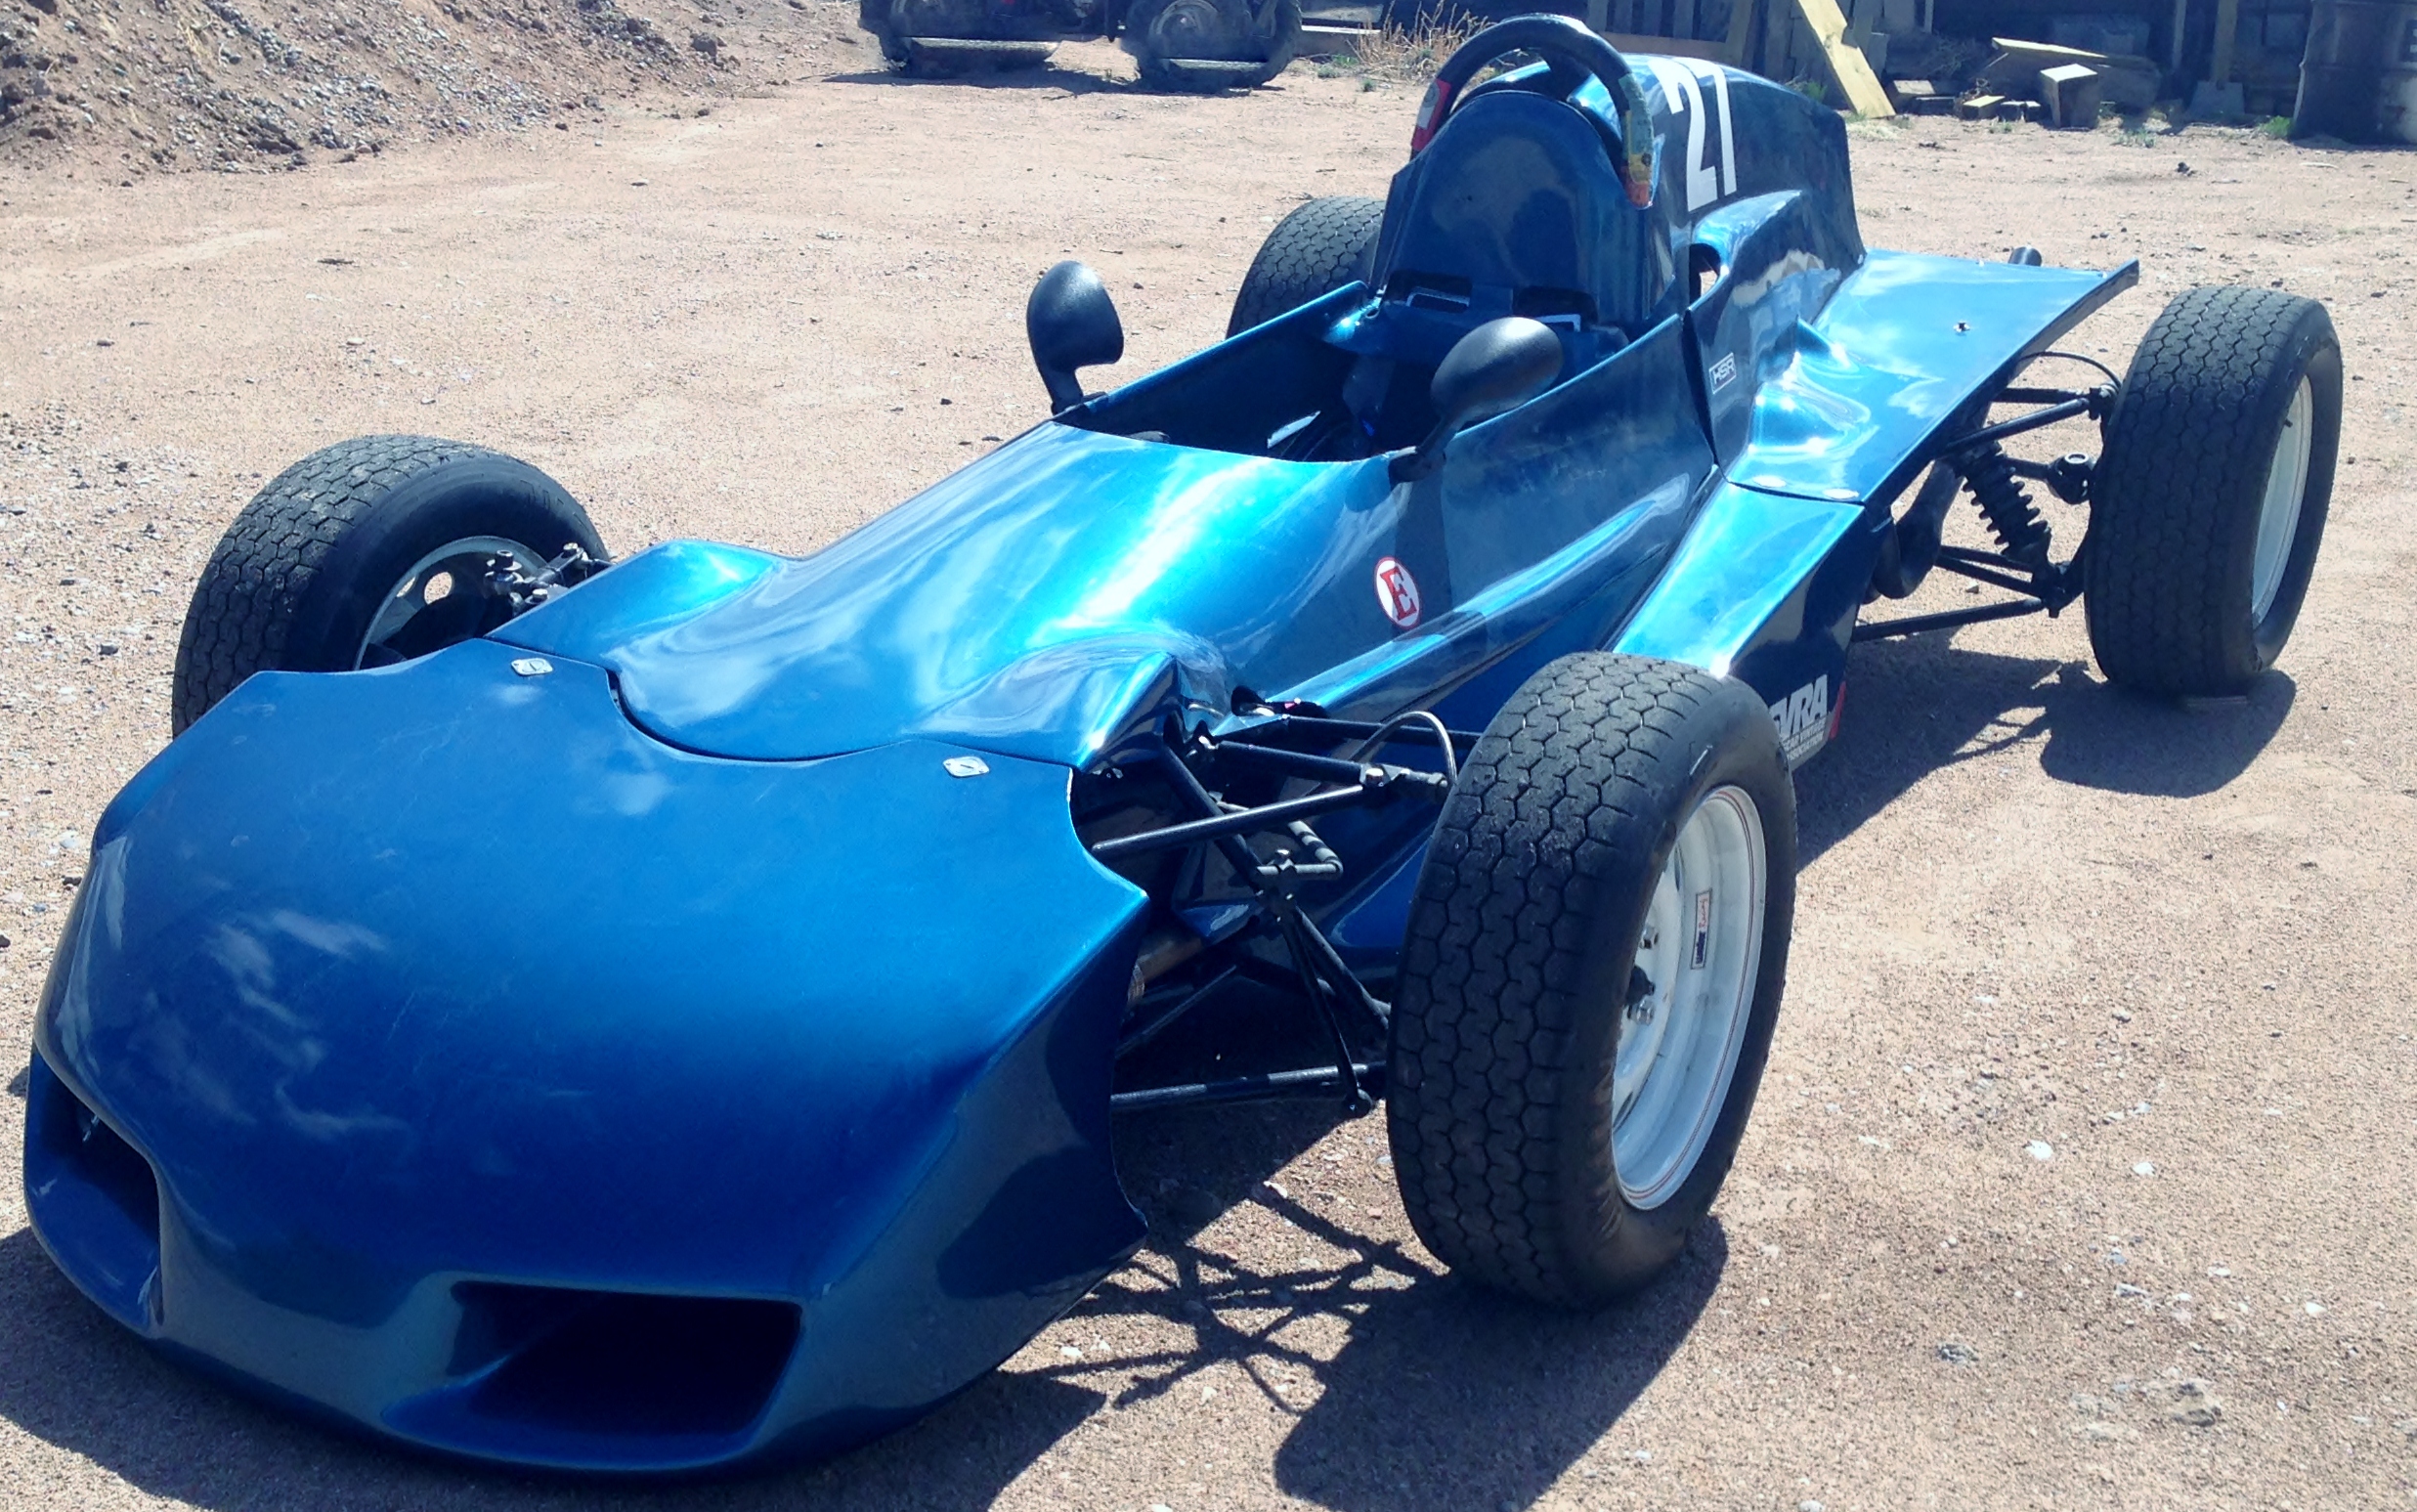
Last winter I decided to take the blue 027, AM74-5 apart for refurbishment.  The original Farley engine was 4 years old and starting to show loss of compression and leak down.  Since Curtis has retired from the business I move to a local Colorado engine guy, Pete Christensen of Total Precision Engines, http://www.totalprecisionengines.com.

We decided on a new block and rods and pistons.  Total rebuild looks good on the dyno!

At the same time I shipped the engine I crated up the Hewland to go to Taylor Race Engineering.  Handed off the crate to the trucking company here in Santa Fe and on the way to El Paso to transfer trucking companies, the crate was LOST.  What?  How do you lose a 100 pound black tool box in 50-75 miles?  Learned a valuable lesson.  Insure your freight.  I didn’t insure and the trucking company was willing to settle the loss for 10 cents/pound!   Lots of phone calls etc.  Finally issue was resolved when Vice-Pesident of company admitted they lost and we settled on a value of a used Hewland gearbox.

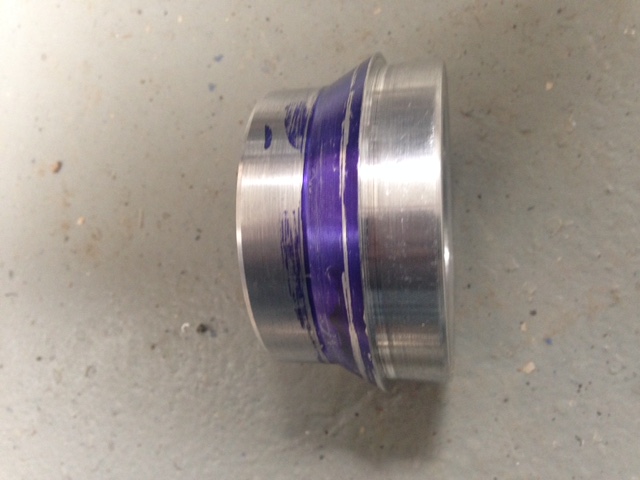
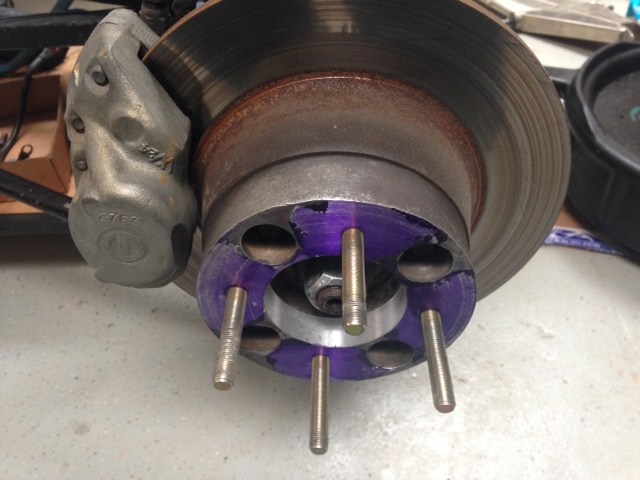
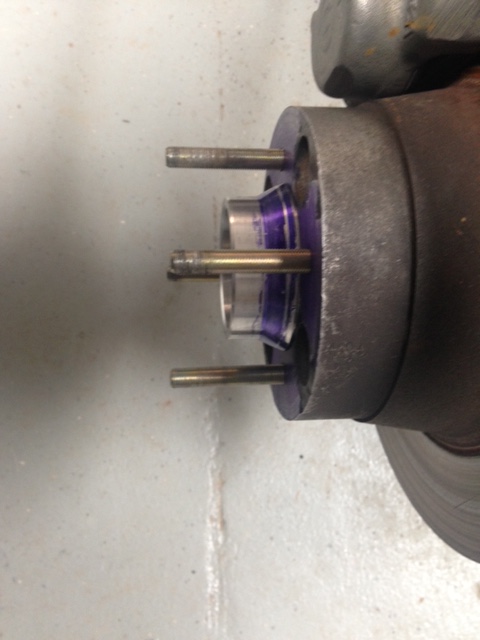
I was able to take a spare Hewland and ordered the stub axles to convert it from cv’s to donuts.  Also that box was a 5 speed and I changed out the lay shaft to a 4 speed.

All of this took and incredible amount of time waiting for parts etc. I probably wasted to much time waiting for the trucking company to resolve the loss/claim.  Anyway May 8 the blue Elden was at Sandia Speedway for its first shakedown.  Mostly everything was okay but a nagging handling problem needs to be addressed.

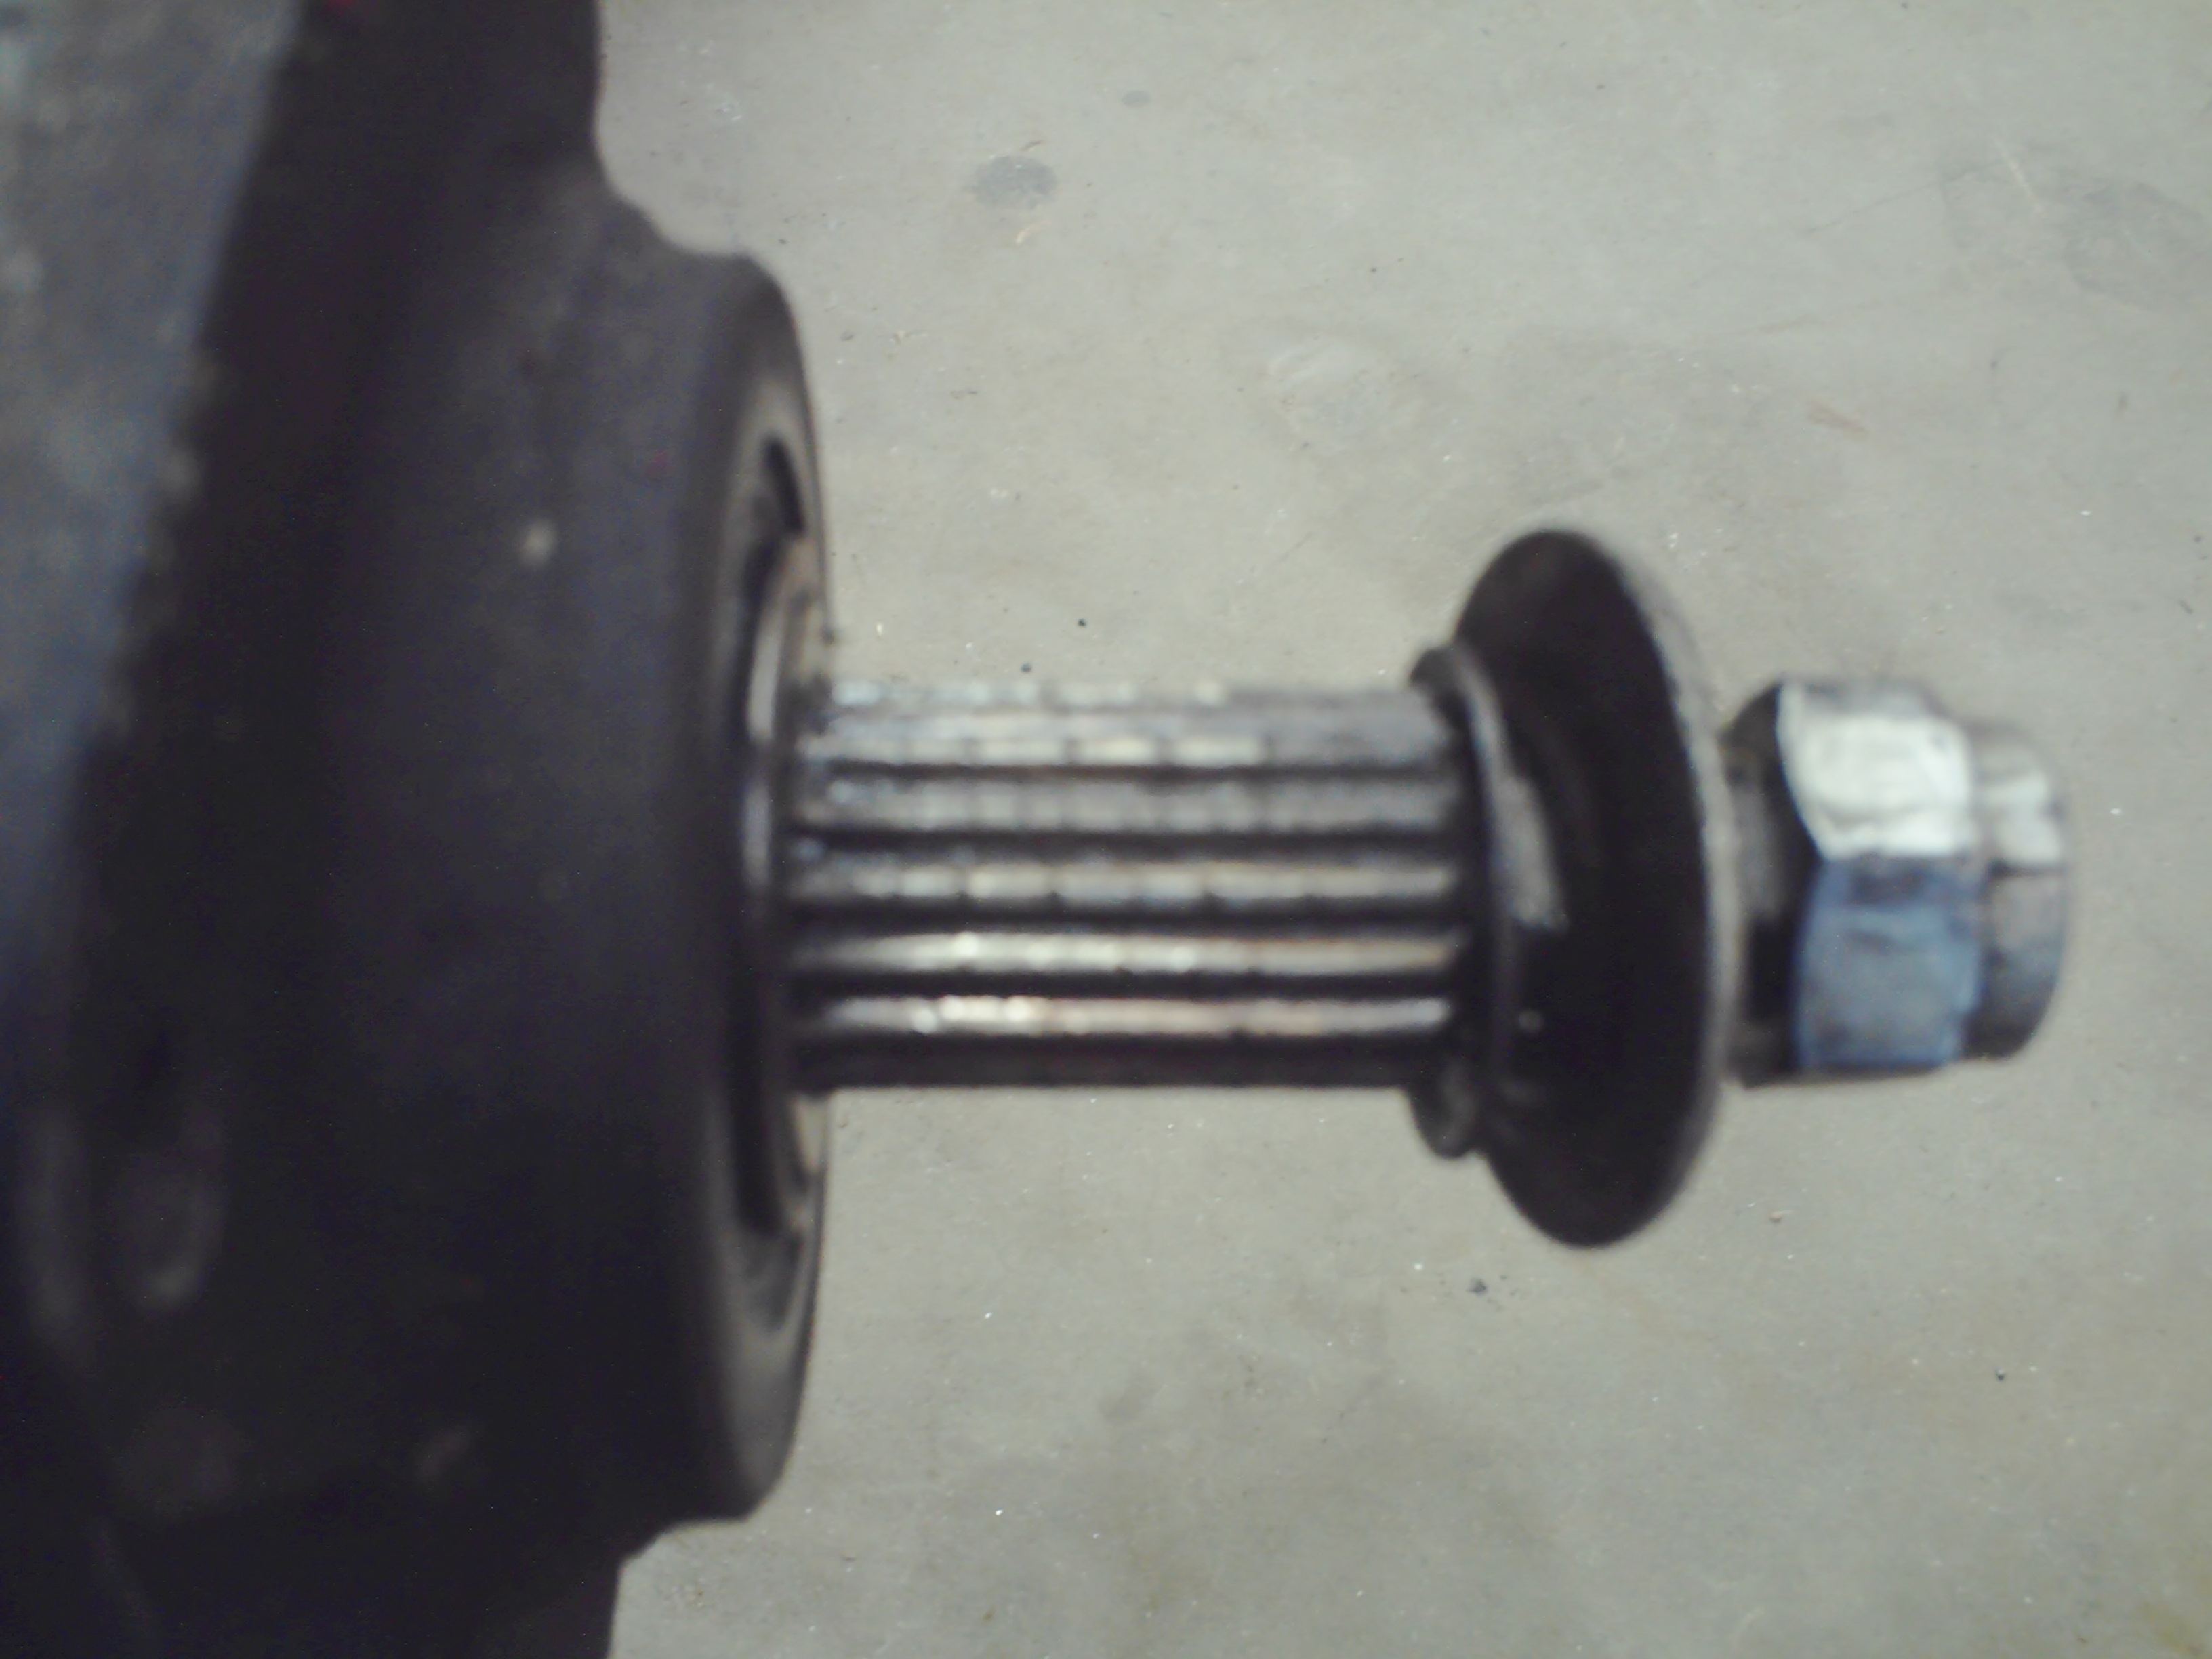
Red Elden #53, AM 73-79 ran in a solo event last October.  When we unloaded it from the trailer found a broken rear stub axle.  The Hillman Imp axles are very weak.  So I went on a search for an upgraded solution.  The Lotus Europa uses the same axles and several ideas have been used.  Couldn’t find a supplier.  Finally found a sastisfactory replacement.  Still need a long term solution.

In the last solo event the engine would bog badly at launch.  Found timing way off.  At the first race the engine seemed weak.  I bought this as used low time engine.  But to make the story short, wrong jets in carb, timing off, # 2 cylinder down on compression and leak down on # 2 -18%!   Other cylinders at 1-2% leak down.  So sending the head to Total Precision Engines for a head rebuild.

So we are now waiting for engine parts.  Trying to evaluate the shift mechanism.  Went back through the u-joints and eliminated all slop.  But the shift 1st to 2nd is almost 2 1/2″ throw.  The rotation from 2nd to 3rd is nearly 3″.   My Van Dieman FC the throw is 1″ and rotation is approx 1 1/2″   So I’m looking to change if possible.

Next race is Sandia Speedway with SWMS, http://www.swms.org, June 1-2 and immediately June 8-9 at Pueblo Motorsports Park with RMVR, http://www.rmvr.com.  Goal is to take 2 cars to each race.

Will update after the June races.


Update May 2017

Well it has been a bit of time since I have updated this blog.  Since Oct last years we did our normal traveling in the fall and then spent most of the winter working on Elden AM74-5 and 73-39 and Am73-79

Elden 74-5 was found to have mismatched front uprights.  One was 1/2 ” taller offsetting the hub center line.  Borrowed 2 different ones from our last acquisition and began a search for new replacements.  Was introduced to 2 potential suppliers in the UK. One private individual and another a race shop:

https://www.mk8motorsport.com/

I also spoke to Pat Prince at Pat Prince  Engineering and he has the jigs for the suspension parts.  So soon I will be sending the stuff I need to Pat for repair or fabrication.

We are now running the new Hoosier VFF treaded tires a bit difference that the slicks I have run for years.  But we are nearing an optimum setup.

Elden #2 was nearing completion for this racing season.  Note I am doing preservation not restorations so I don’t strip down the car. When I picked up the car there was an invoice to “straighten the frame”.  Well it is still “bent”.  I couldn’t align the car, ran strings down the chassis found the rear sub frame tweaked 1/2″ at least.  So work has stopped.

Elden #3 AM-73-79 is getting a new body.  The old body had been cutup and missing some parts so I ordered a new body from:

http://www.marchantandcox.co.uk/m-and-c-moulds

New body

Hoping that body is here in June.  So the plan right now is to strip the bent chassis down for repair and to move forward on Elden AM 73-79.

Racing highlights:  We ran ran Elden 74-5 the MK10C rebodied Falconer and the video link is:

Well we will catch up again after the SVRA Open Wheel World Challenge at Indianapolis,  in June.


The History of the Falconer Rebody

It has always been a question of mine on the true validity of the Falconer body on my Elden MK10C.  The previous owner had the car re bodied but the top cockpit is different from the original Falconer design. The reason was under Lee Stohr’s ownership he converted the car from an outboard suspension to front inboard with rockers and modifications were needed in the cockpit body panel to clear the rockers.

A few days ago Allan D. helped me inventory the spare body panels I have accumulated over the several acquisitions.  When I bought the 74 MK10C from South Carolina it came with Lee Stohr’s original body.  I have toyed with the idea of putting that body back on so Allan D. and I setup the panels and low and behold this is what we found.  The following pictures show what transpired:

picture 1


The first picture shows the Swift type nose cone Lee Stohr used and the cockpit, but with something missing.  Also note the rear engine cover very similar in design as the Falconer.

Falconer original vs as now

If you notice the original Elden Falconer Body work, copied from a picture on Race-Cars.com, there is a bubble in front of the cockpit opening, assume to deflect air over the drivers head.  By using Lee Stohrs middle section incorporating the inboard rockers the Falconer bump was eliminated.  I will say I wish I had the bubble as the wall of air off the nose is very annoying at 100 mph, trying to lift my helmet off!

So the mold I have is the final product of the current Falconer body style.  What is great I now understand the evolution of this cockpit body panel and the rest is original Falconer.

Fianl Falconer mold

Thanks to Lee Stohr for the picture of his car in 1980, and Race-Cars.com for their tremendous archive.


Elden MK10 Falconner Progress

It was a busy off season.  Curtis Farley at Farley Engines built a new motor.  Scat crank and light weight flywheel/clutch etc.  I went thought the Hewland and confirmed all bushings etc where in good shape.

First event was April at Sandia Motorsports in Albuquerque, NM running a Southwest Motorsports (www.SWMS.org) vintage race.  I was not happy:  1) brakes have always been an issue.  With the new locking axle nuts on the Imp axles to eliminate loosening of the nut during braking.  John Hammill at http://www.hamfab.com fabricated the nuts and washers.  But the stopping ability is still poor.  I used old Ferrado DS11 pads as I had some and with the rear disk rotors being unobtanium didn’t want to get real aggressive.  I soloed the the DS11 a long time ago. Well let’s move on.

The rear external disk rotors are Sunbeam Rapier, per Peter Hampsheir.  I have scoured the internet trying to find a backup pair.  Contacted the Sunbeam Rapier UK club and found a pair of used.  I have cleaned them up and bored the bolt circles to match the car and have taken them to Santa Fe Auto Machine to have them faced.

So with a backup rotors I put some old Millitex pads on.  They work a 100% better than the DS11, but…..  Will look for some Hawks or Performance Friction Carbon pads.

One thing became more apparent that without adequate rear brakes the under steer is worse.  Going to add brake bias adjuster to help find that happy a balance.

Second race of the year at SWMS I found the engine running warmer than I wished.  70 deg day overcast and water temp 105deg C and rising.  Backed  off RPMs and the issue subsided.  So decide to have the radiators looked at.  The “mule” engine was an unknown and now the Farley engine is known hp.  That added hp maybe a bit much for 6000 ft and dry air,  so having the radiators checked.

Another issue found at the last race was  very “vague” shifter.  2nd gear was tough to get into and 4th was there maybe.  Found that in my search for removing slop in the shift assembly, I actually introduced some drag into the pivot at the front of the shift handle.   Redid the assembly and the next race much better.

So we are getting there.


Update Elden MK 10 Race Season

Well lets update the progress and or plans for the Elden MK10.

Engine was removed and sent to Farley Engines for rebuilding. The existing engine was what I call a “mule” motor.  It was a rebuild of the “as-found” with no special effort spent to make horsepower but to allow the shakedown of the chassis.  Now its time to have that special motor.  New SCAT crank and Tilton clutch assembly are the two big ticket items.

While the engine is at Farley’s catching up on some maintenance chores.  1) Check all rear hub assemblies.  MK 10C stub axle issue

The Elden uses Hillman Imp stub axles which is a known weakness and I plan to replace eventually with a modern axles from Taylor Engineering.  But for now bearings look good.  HamFab Inc has completed some new locking washer/nuts for the stub axles.  They, lock washers/nuts, were missing on the MK 10 Elden. Regular locking hex nuts and hardened washers were present when I got it and didn’t understand the importance of the locking requirement.  Of the 3 Eldens in the shop, one had correct parts.  Without the locking washer which is slid over the “D” shape of the stub axle, the large nut the left rear nut will loosen with every application of the brakes.  Next a soft rear pedal and time to stop.  Tried other mechanism’s to stop that before I went on a search to understand the problem.  Now I know some will say the Lotus Elan used the same stub and this problem was addressed by many others, but I am bullheaded to ignore that fact. 🙂

IMG_0449

Rear Hub Center Revolution Wheel

2) One of the concerns I have had with the wheel studs is that they are put in fully shear.  This car had original short wheel studs front and rear, 3/8″-24.  Many people had put 7/16″ dia wheel studs as the MK 8 has.  I wanted to keep the 3/8″-24 as the 3 sets of Revolution wheels that came with the car are set up for the 3/8″ studs.  So I went on a treasure hunt and found longer studs in the UK for the front, Triumph Spitfire and installed.  The rears run a 1″ Al spacer with conversion from the Hillman bolt circle to the Spitfire bolt circle.  The a long grade 8 bolt is used for the wheel stud.  So when you put the wheels on the wheel nuts are the main centering device to the hub assembly leaving the wheel studs in shear.  So the plan was to have made some hub centers for the various wheels I will use:

IMG_0448

Existing Wheel Spacer

First is the Revolution wheel. The rear Al spacer has an ID of 2.75″ and the center of the Revolution wheel is 2.5″ ID.  So I made on my shop lathe:

Now with this installed the wheel nuts mount very easy and this should provide significant support for the wheel studs.  Wheel centers for the Revolution front and for the steel wheels front and rear are next.


IMG_0450

Rear Hub Center Installed  

So we now wait for the engine and the first April race in Albuquerque, NM.


Back from the RMVR Vintage Race Weekend

June 1-2, 2013 we participated in the Rocky Mountain Vintage Racing (RMVR) race at Pueblo Motorsports Park at Pueblo, Colorado. Had some 20+ FF’s. Haven’t raced on this track in at least 2 years. The new surface was great.

Took the Elden MK10 with the Falconer body. Second race weekend. Car ran well but still unhappy with the rear brakes. Can’t seem to get them to do their fair share. Engine ran good pulled 6100 rpm on the 1/2 mile straight at 5500 ft elevation. I didn’t have any parts failures so all in all it was a good weekend.RMVR Pueblo Motorsports ParkPictures shot By Rupert Berrington Action Photography

Time to Race the Elden MK10

We took the MK10 Falconer out to the last vintage race in Albuquerque, NM on April 27th. Won the class, well I was the only finisher, but I scored a WIN!  Anyway the engine was running very lean, and the brakes were there but not awe inspiring.  So I kept the laps down and came home to work on the car.

Replaced all the master cylinders with new.  I had rebuilt the old ones and I swear I have not had that bad of luck before.  Rebuilt the carb and rejetted.  Moved the shoulder belts mounting point so as to fit the HANs device properly. Built a new dash as the original dash has the gauges down and behind the steering wheel and I wasn’t comfortable with that.  So made a paper etmplate and then a new Al panel with the gauges higher up above my hands.  The Falconer body allows this configuration but the MK8 will not so I guess I had better get used to the original configuration.

Car is down and loaded into the trailer.  Racing in Pueblo, Colorado with Rocky Mountain Vintage Racing:  http://www.rmvr.org, http://www.pueblomotorsportspark.us, this weekend  Looking forward to seeing other Elden’s and more Formula Fords.  Can’t wait.Image

Update on MK10 and MK8

All engine parts are at the machine shop (Santa Fe Auto Machine) her in Santa Fe, NM I have the MK10 and the MK8 engine in the shop so allot of parts to order and manage.

When the shop gets done we will complete the order for bearings and rings, etc. Shopping around between BAT and Pegasus finds a large variance in costs. I keep a spreadsheet of all current prices for “ALL” parts I have used. If you want a copy of the list send me an e-mail.

Trying a new firm for RaceTech guages. Ben at Transatlantic Raceparts, Ltd internet site is: http://www.race-parts.com. They were recommended by RACETECH in England as a source of the gauges for the MK 8. Using a dual oil pressure/oil temp gauge and a electrical water temp gauge. Give them a try.

So back to cleaning parts and working on the MK 8 brakes.

Larry

Update 12-9-2012

Good Morning loyal followers 🙂

A quick Update.  Allot of work has been completed.  John and Adam Hammil finished building new radiator tubes to route the lines in a much more clean fashion from the old 12″ flex hose.  New swirl pot and also corrected a minor frame issue and helped me pour a new seat.  HAMFABINC.com

Got my used treaded tires from John Berget.  Since the Dunlops are hard to come buy got a set of Avons for initial setup and testing.  http://www.jbracingtires.net

Engine compression checks good with <6% variation.  Will do leak down tests after track day to finish breaking in and getting all the seals warm.

Car is to be put on the ground today to set initial alignment and ride height.  Then into the trailer for a Dec 16th test date at NAPA Speedway in Alb, NM on the road course.  Several of our open wheel friends will be there to support the efforts.

The Elden MK8 1973 is moving closer to its place on the roll around.  After track day will pull the engine/trans to put new water pump, pulleys and belts, and freeze plugs.  Look for new pictures of the shop later today with the FF lineups.


Fuel Cell can complete–Almost

Finished taking the poster board molds and converted to 0.060″ Al sheet preferably 5052 to make the bends easier. Came out looking better than I had hoped. Still need John Hammil to weld the top joints. Next week.

Relocated the Fire Extinguisher under my legs with the battery and re-plumbed it along with relocating the actuator. Note on this system there are two (2) safety pins that must be removed before the system can be used. So I tie 2 red streamers on those pins as a warning”Removal Before Racing”. Now to complete the Fire Extinguisher and battery cover out of fiberglass.