
My shop has a very non-level floor, 3/4″ drop in 8′ in various places So I built some scale holders that have leveling feet. Each leveling pad is made up of 1 1/2″ angle iron I had around the shop. I welded a tube on each corner that is threaded for 3/8″ leveling pad. One half of the assembly has 3/4″ plywood with 2″ high density foam as a resting pad when you want the car off the scales. The other half is for the 15″x15″ scale pad which is used for all measurements.
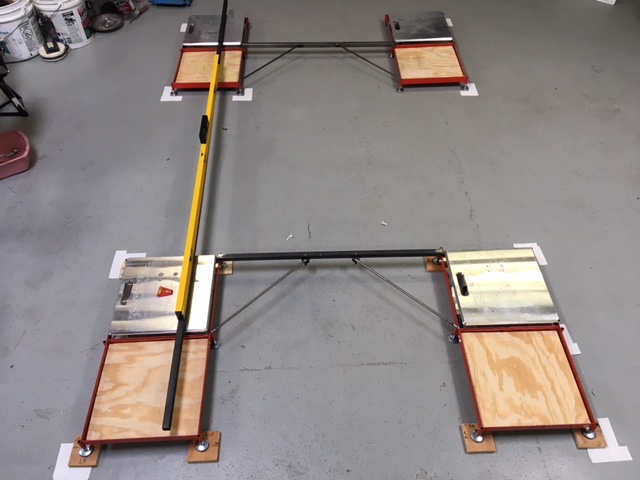 I then laid out on the shop floor the wheelbase/track of the Elden and marked the floor for the leveling pads. Took a large level and established level on the Left Front Scale Pad and projected that level across the other corners. Put a small level on each pad and iterated leveling the pad to it’s self and its other pads until all pads are level to themselves and all others. Marked floor for future use.
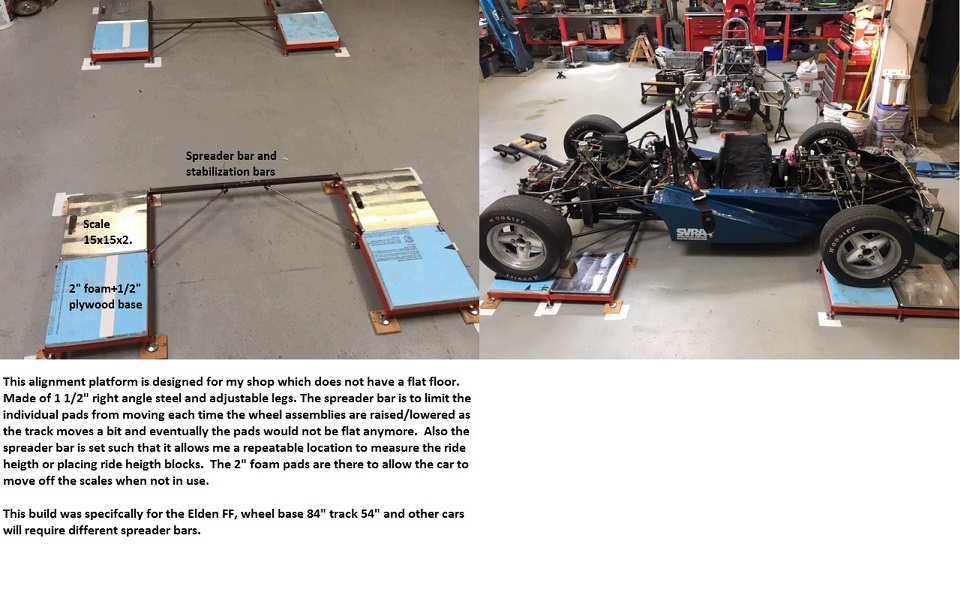
One issue I had as I began to use this setup pad was that each pad assembly would move each time the chassis was lifted, the camber change would move the pads sideways. Also I didn’t have a good point to measure and set the ride height. So I added a cross brace to the pads and that eliminated lateral movement and reliable place for ride height. Not gorgeous but cheaper than a full setup pad.
I grew tired of trying to align the Elden’s with the various wheel/tire combinations I have. So I decided to build my own wheel/hub stands.. Took a 1/2″ plate Al 6061, 3″ Aluminum 6061 angle and 4 casters to build my hub stands.
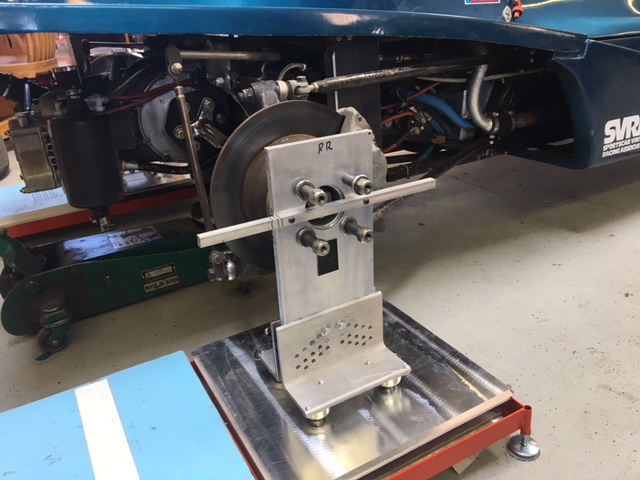 I drilled various holes to allow the wheel center line to move in 1/2″ increments to simulate the various wheel diameters I may encounter. The hub stand eliminates the wheel/rim and sets on the scale pads. This allows setting ride height, castor/camber and toe much easier. On the center line of the hub stand is a 12″ bar I use to establish toe of the wheel.
Another problem I had was trying to locate the chassis center line and setting the track at that center line. Once I found the center line by measuring many different points of the chassis pickup points and using the drawings found earlier.

Then made a permanent mark on the top chassis front/rear. I then took a 6 ft level-attached a 6 ft tape measure on the top of the level, and installed a pointer on the level at 3ft to indicate the center line mark on the chassis. I then spanned the level across the wheel/hub stands to measure the track. Using plumb bobs at the end of the level equidistant from the center line, adjusted the a-arms. This is difficult on the front, as the a-arms have a very narrow range to use and I found a pickup point had been bent. The rear this was much easier to establish.


For more details on how I make this all work please write me a note and I will try to elaborate more.
