Subaru-Brat Water Pump Sketch’s

After finishing the installation of the Subaru-Brat water pump on my H-Mod, SIAM-Fibersport, I was asked for the sketches I used to fabricate. So I went on a massive hunt on where I got these sketches and best I can figure was a 2007 Post in the now defunct Yahoo Groups H-Mod forum that Nat Sherrill, Marty Stein and others managed. Best I can tell is that Marty and Franklin Rudolph were involved in posting these sketches. If I learn otherwise I will correct.

So along with pictures of my installation on here are the sketches I used.

Good luck and share your completed photos.

SIAM Update

Featured

It has been a few years since real work on the SIAM was done. The Elden’s keep the shop busy but with this pandemic and waiting for some racing parts I decided the catch up some SIAM work.

First I rebuilt the the Crosley Steering box with new bushings and seals from Service Motors, https://www.servicemotors.net/. Then I tackled the fun job of the Crosley front axle King Pins. The King pins required some tooling to allow reaming to fit and maintaining the alignment of the top and bottom. So I built this reamer tool.

5/8″ Adjustable Reamer with Extension

A project I started December 2017 was to convert to a Subaru Brat water pump. I had previously made the pulley, https://lchrestoration.com/category/1954-h-mod-siam/. Now I needed to make a bracket to hold the pump and complete the plumbing.

Subaru Brat Water Pump Bracket

The complete installation:

Subaru Brat water pump installed and back plate fabricated.

Finally, I reinstalled the Crosley front axle. The SIAM is right hand drive and as such the front axle is turned around 180 degrees. That in itself sees to be okay. But I found that the front friction lever shocks were binding up the front leaf springs. So I built a new mounting system allowing the lever shock to move without binding. Wish I had taken a picture of the original but here is the new.

Another thing found was that castor seems off with reversing the axle. Will update this later as the work isn’t done. The following picture shows a castor adjustor on the Crosley Fibersport waiting for restoration here. What is weird it is on the top of the leaf spring and I’m not convinced that it actually adjusts. I would think it belongs on the bottom of the leaf spring. Once the wheels are back on the ground I can confirm all of this.

Crosley front axle castor adjustor?

Will update soon the castor resolution soon.

Adding the Subaru Waterpump to Crosley Engine

Had seen others talk about swapping the original generator driven water pump with a 1980 Subaru Brat 1.6L pump.  That eliminates the generator which for an H-Mod isn’t entirely necessary.  On my engine I had scored a generator eliminator jack shaft.  But still wanted to eliminate the Crosley water pump.

I had seen instructions on the web and some preliminary drawings but until I started turning metal did I fully understand the process.

Parts List

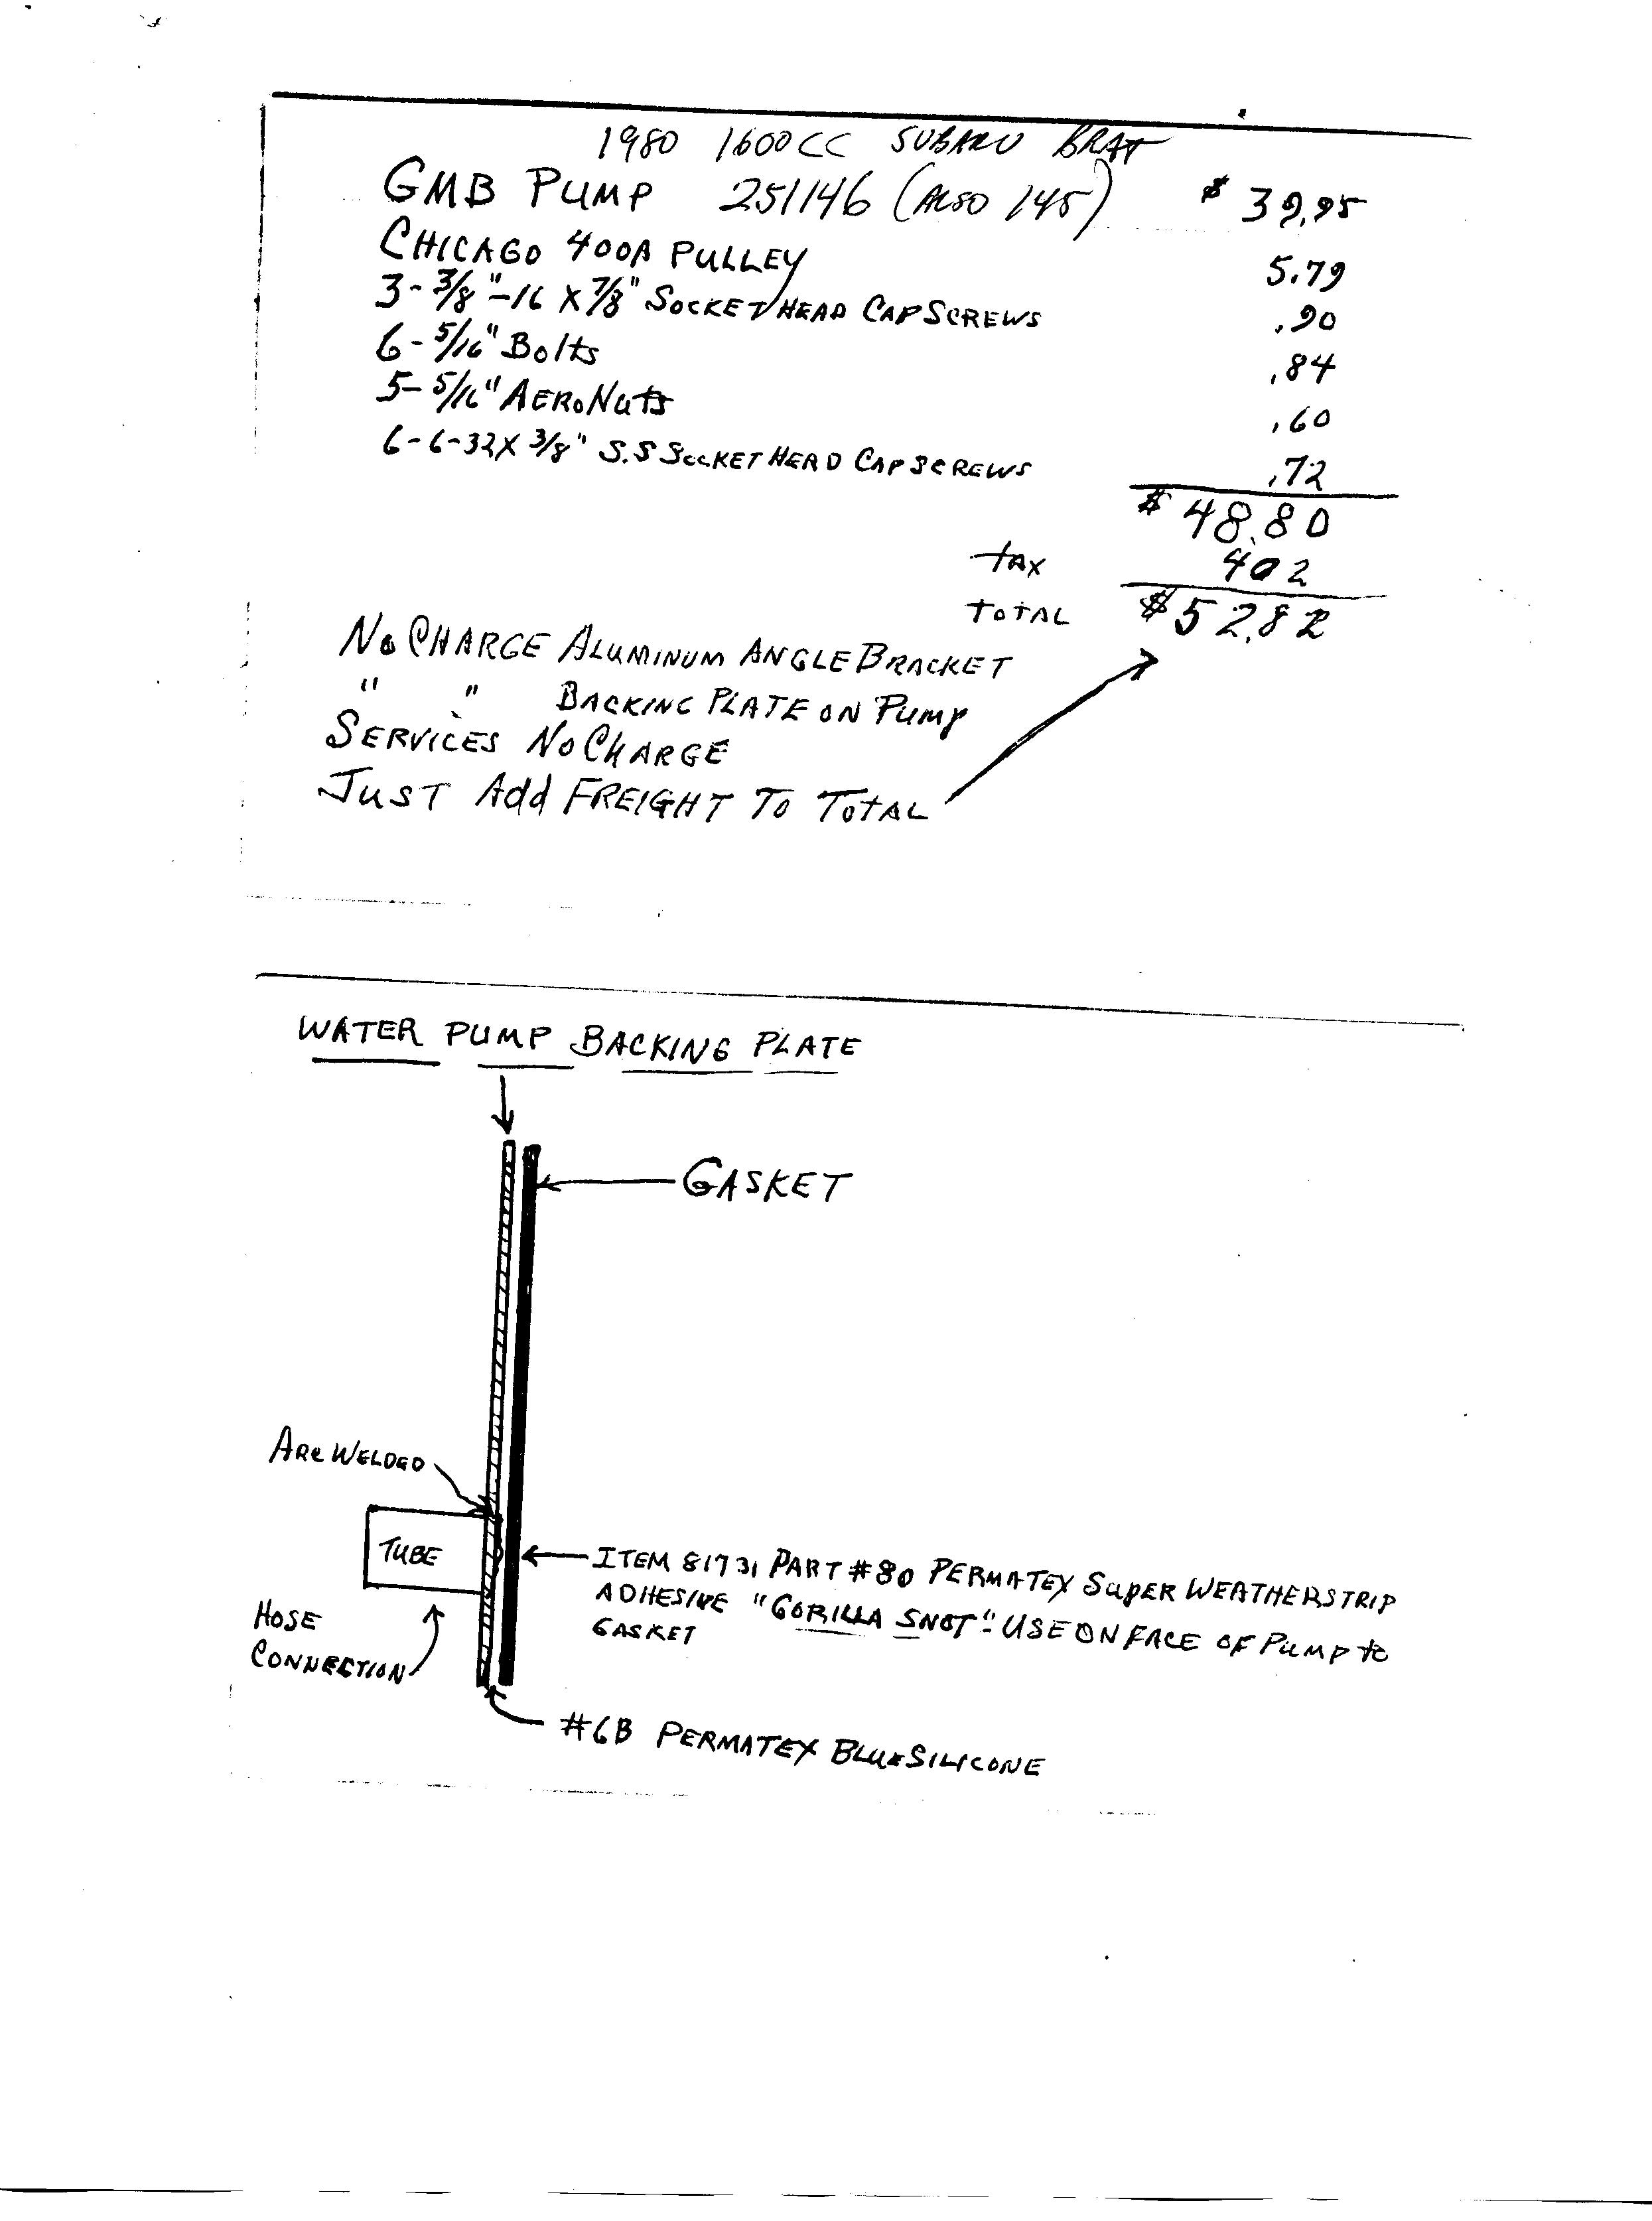
1980 Subaru Brat 1.6L water pump Bech and Arnley #   Picture of pump

Champion 400A pulley- Tractor supply or most hardware stores

6 ea 6-32-1/2″ socket screws

5 ea 1/4-28-xxx hex head bolts and lock nuts/washers

3 ea 5/16-18-5/8″socket head or hex bolt/ washers

3″x2″-1/4″thickness-3 ” long Aluminum angle stock

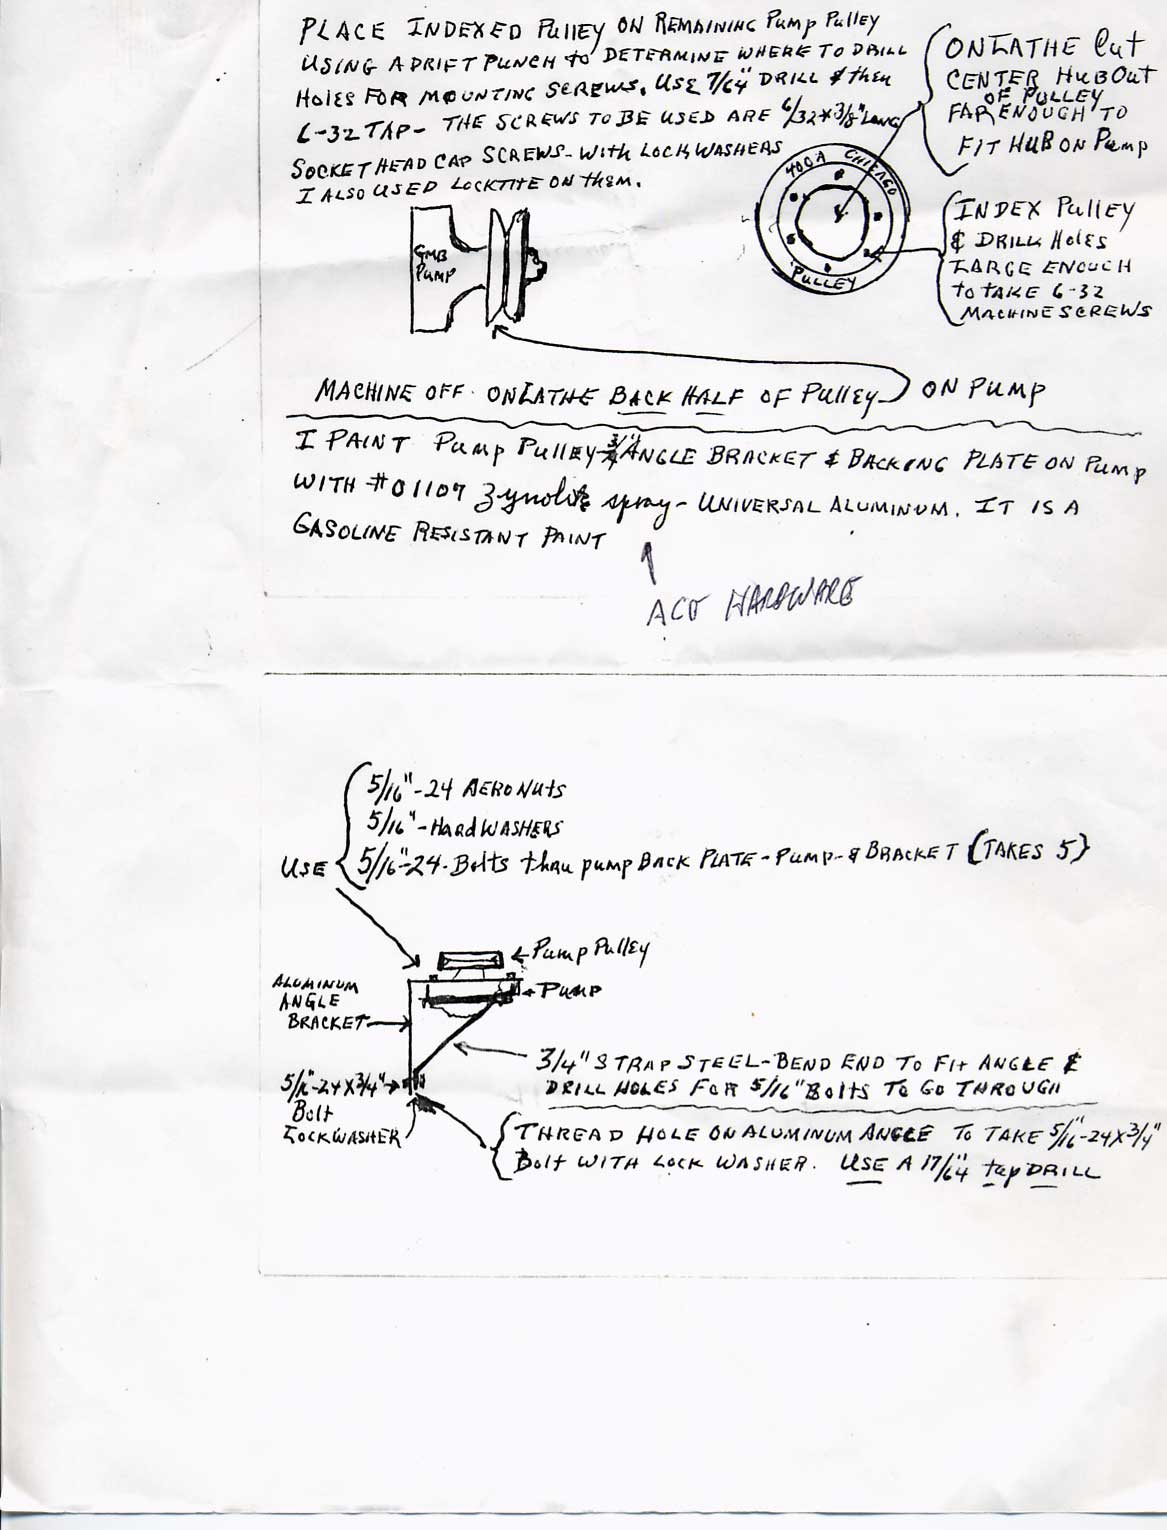
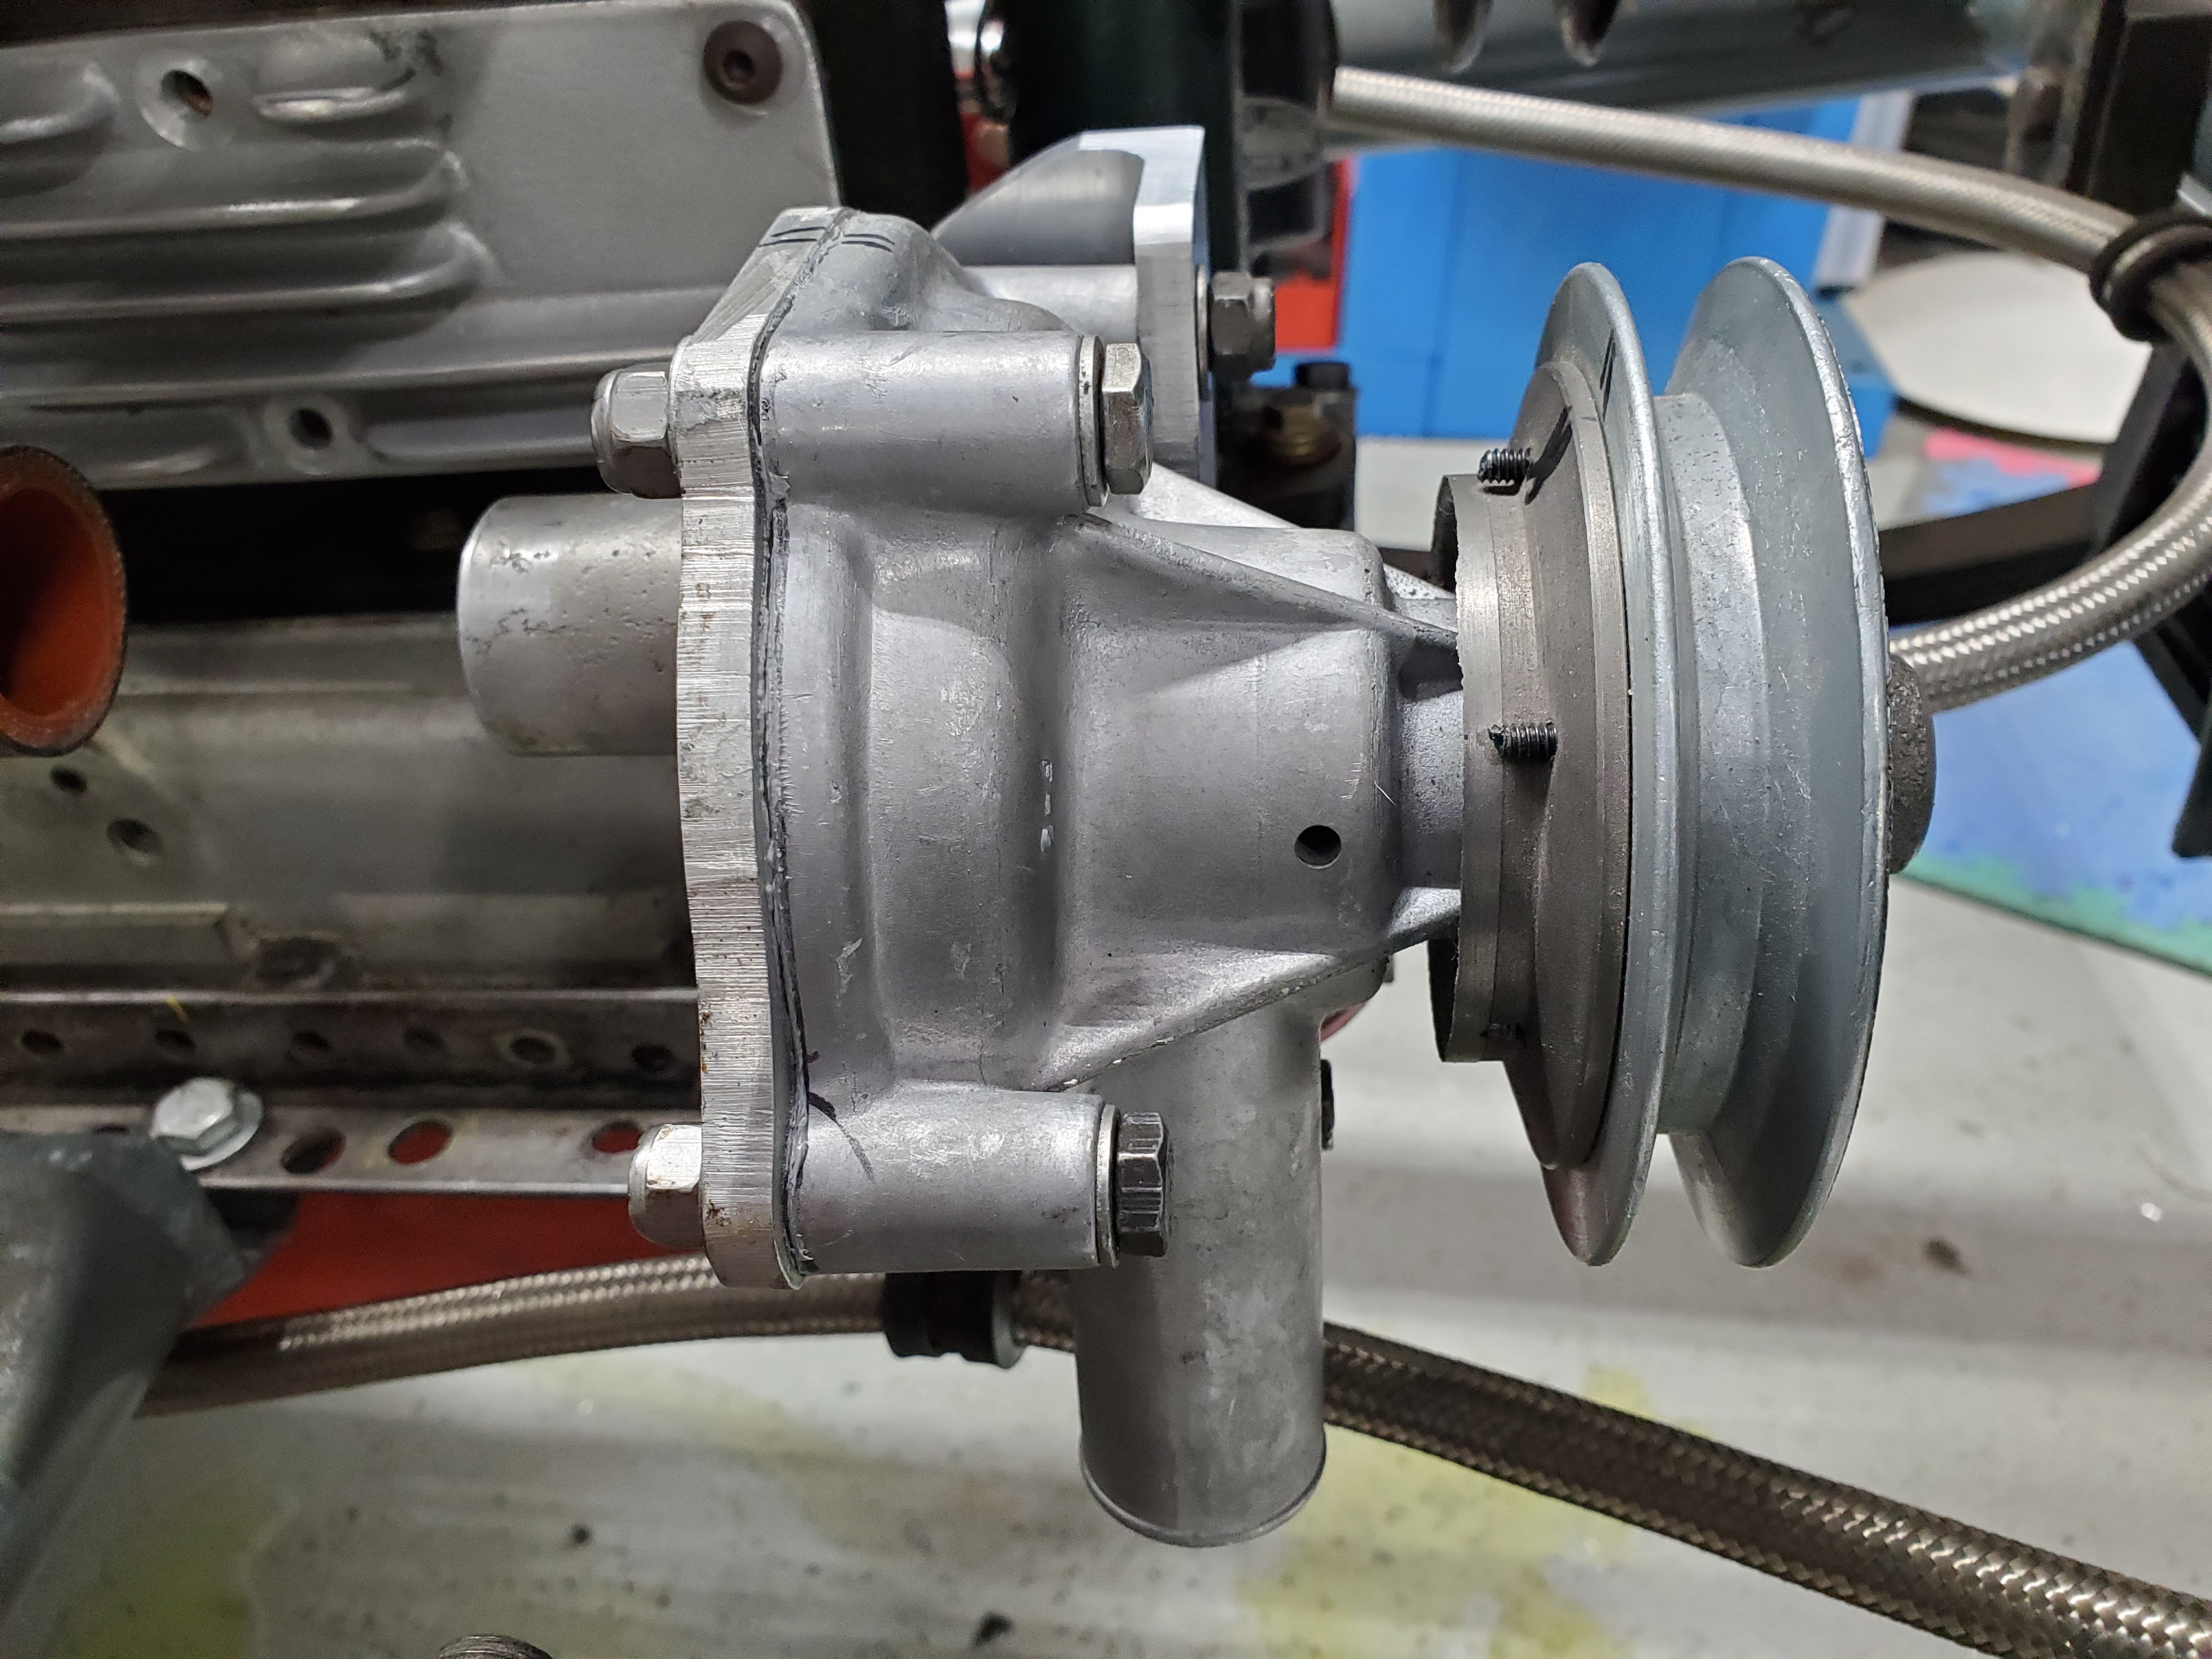
First was to take the Champion 400A pulley and turn the center out of the pulley to allow its flat back face to attach to the front of the Subaru pulley front.

For my pump the diameter of the Champion 400A to fit the pump was 2.015″.  Faced the pulley to ensure flat mating surfaces.

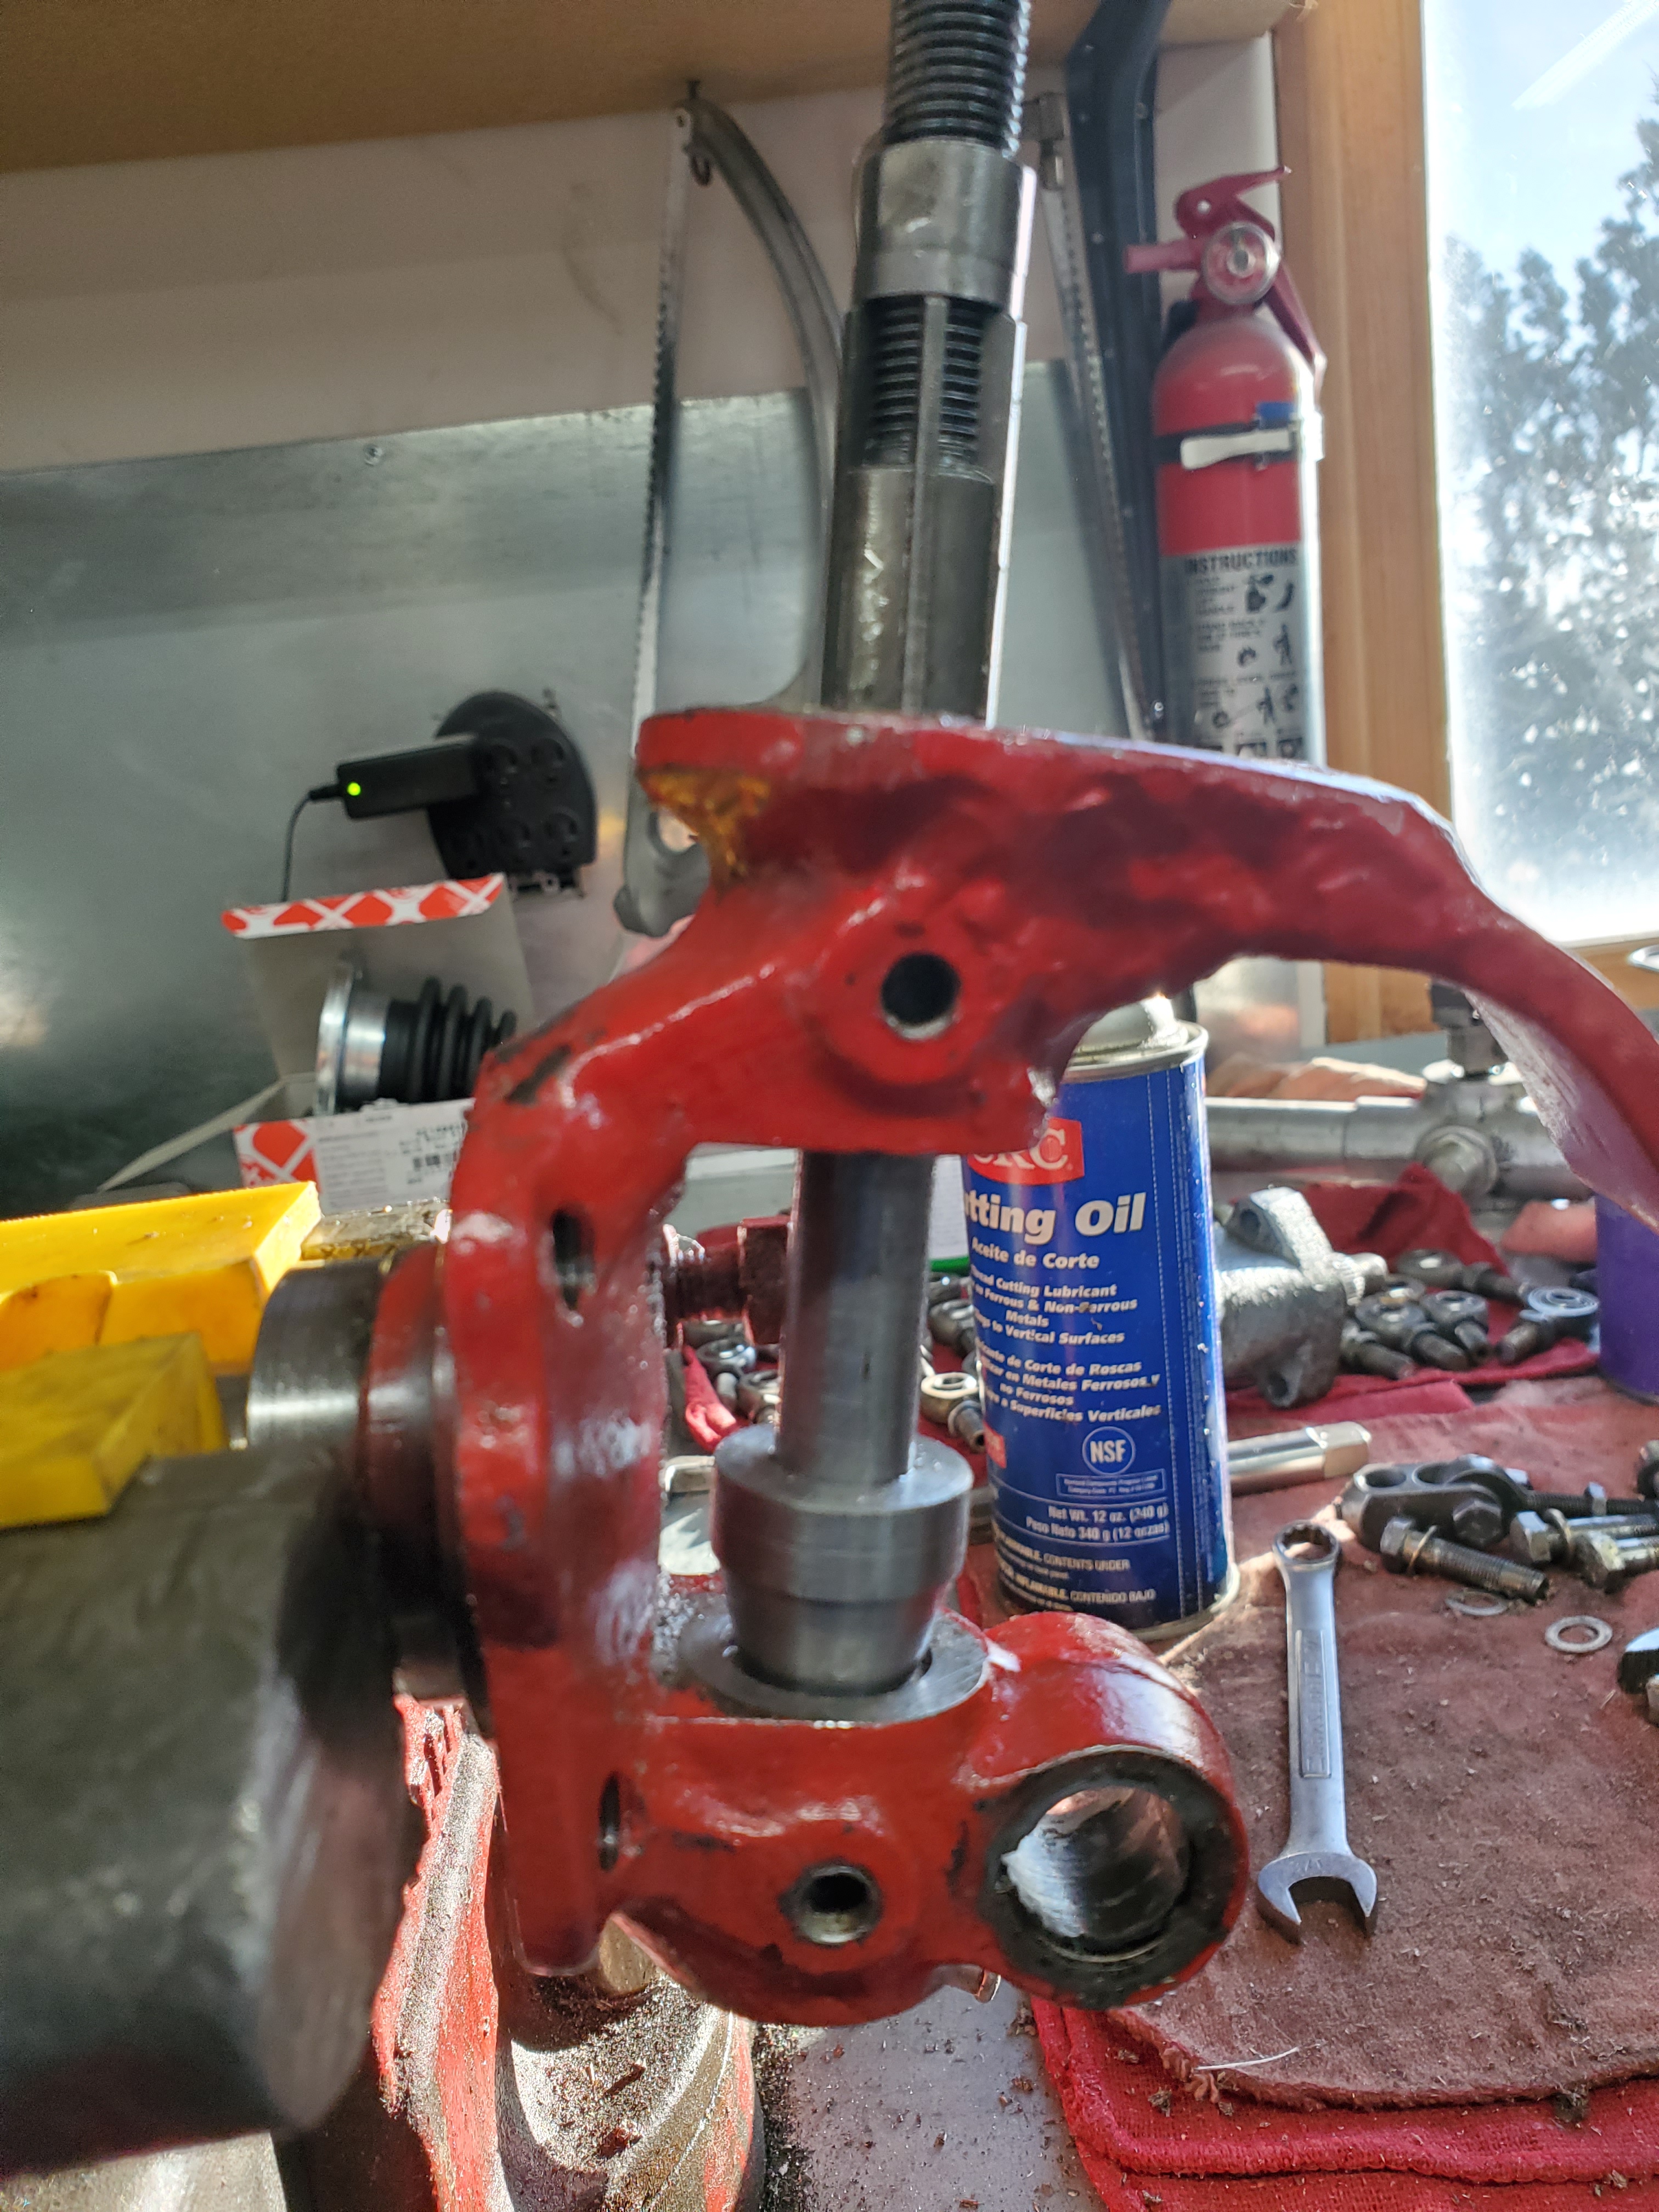
Then Turned the back half of the Subaru water pump off to eliminate the unnecessary material.  I turned down to the pulley bottom.  Beware I turned this on the lath by holding the water pump body still, using dead center on the impeller shaft and turning off the pulley.  The pulley is cast steel and very soft in my situation.  “TAKE ALL SAFETY PRECAUTIONS”


Next determine a bolt circle on the inside of the “Champion 400A Modified” pulley and the Subaru pulley to allow 6ea 6-32 by 1/2″ socket head crews to be drilled thru the Champion 400 A pulley and taped into the modified Subaru pulley.  For my application that was 2.45″diameter.

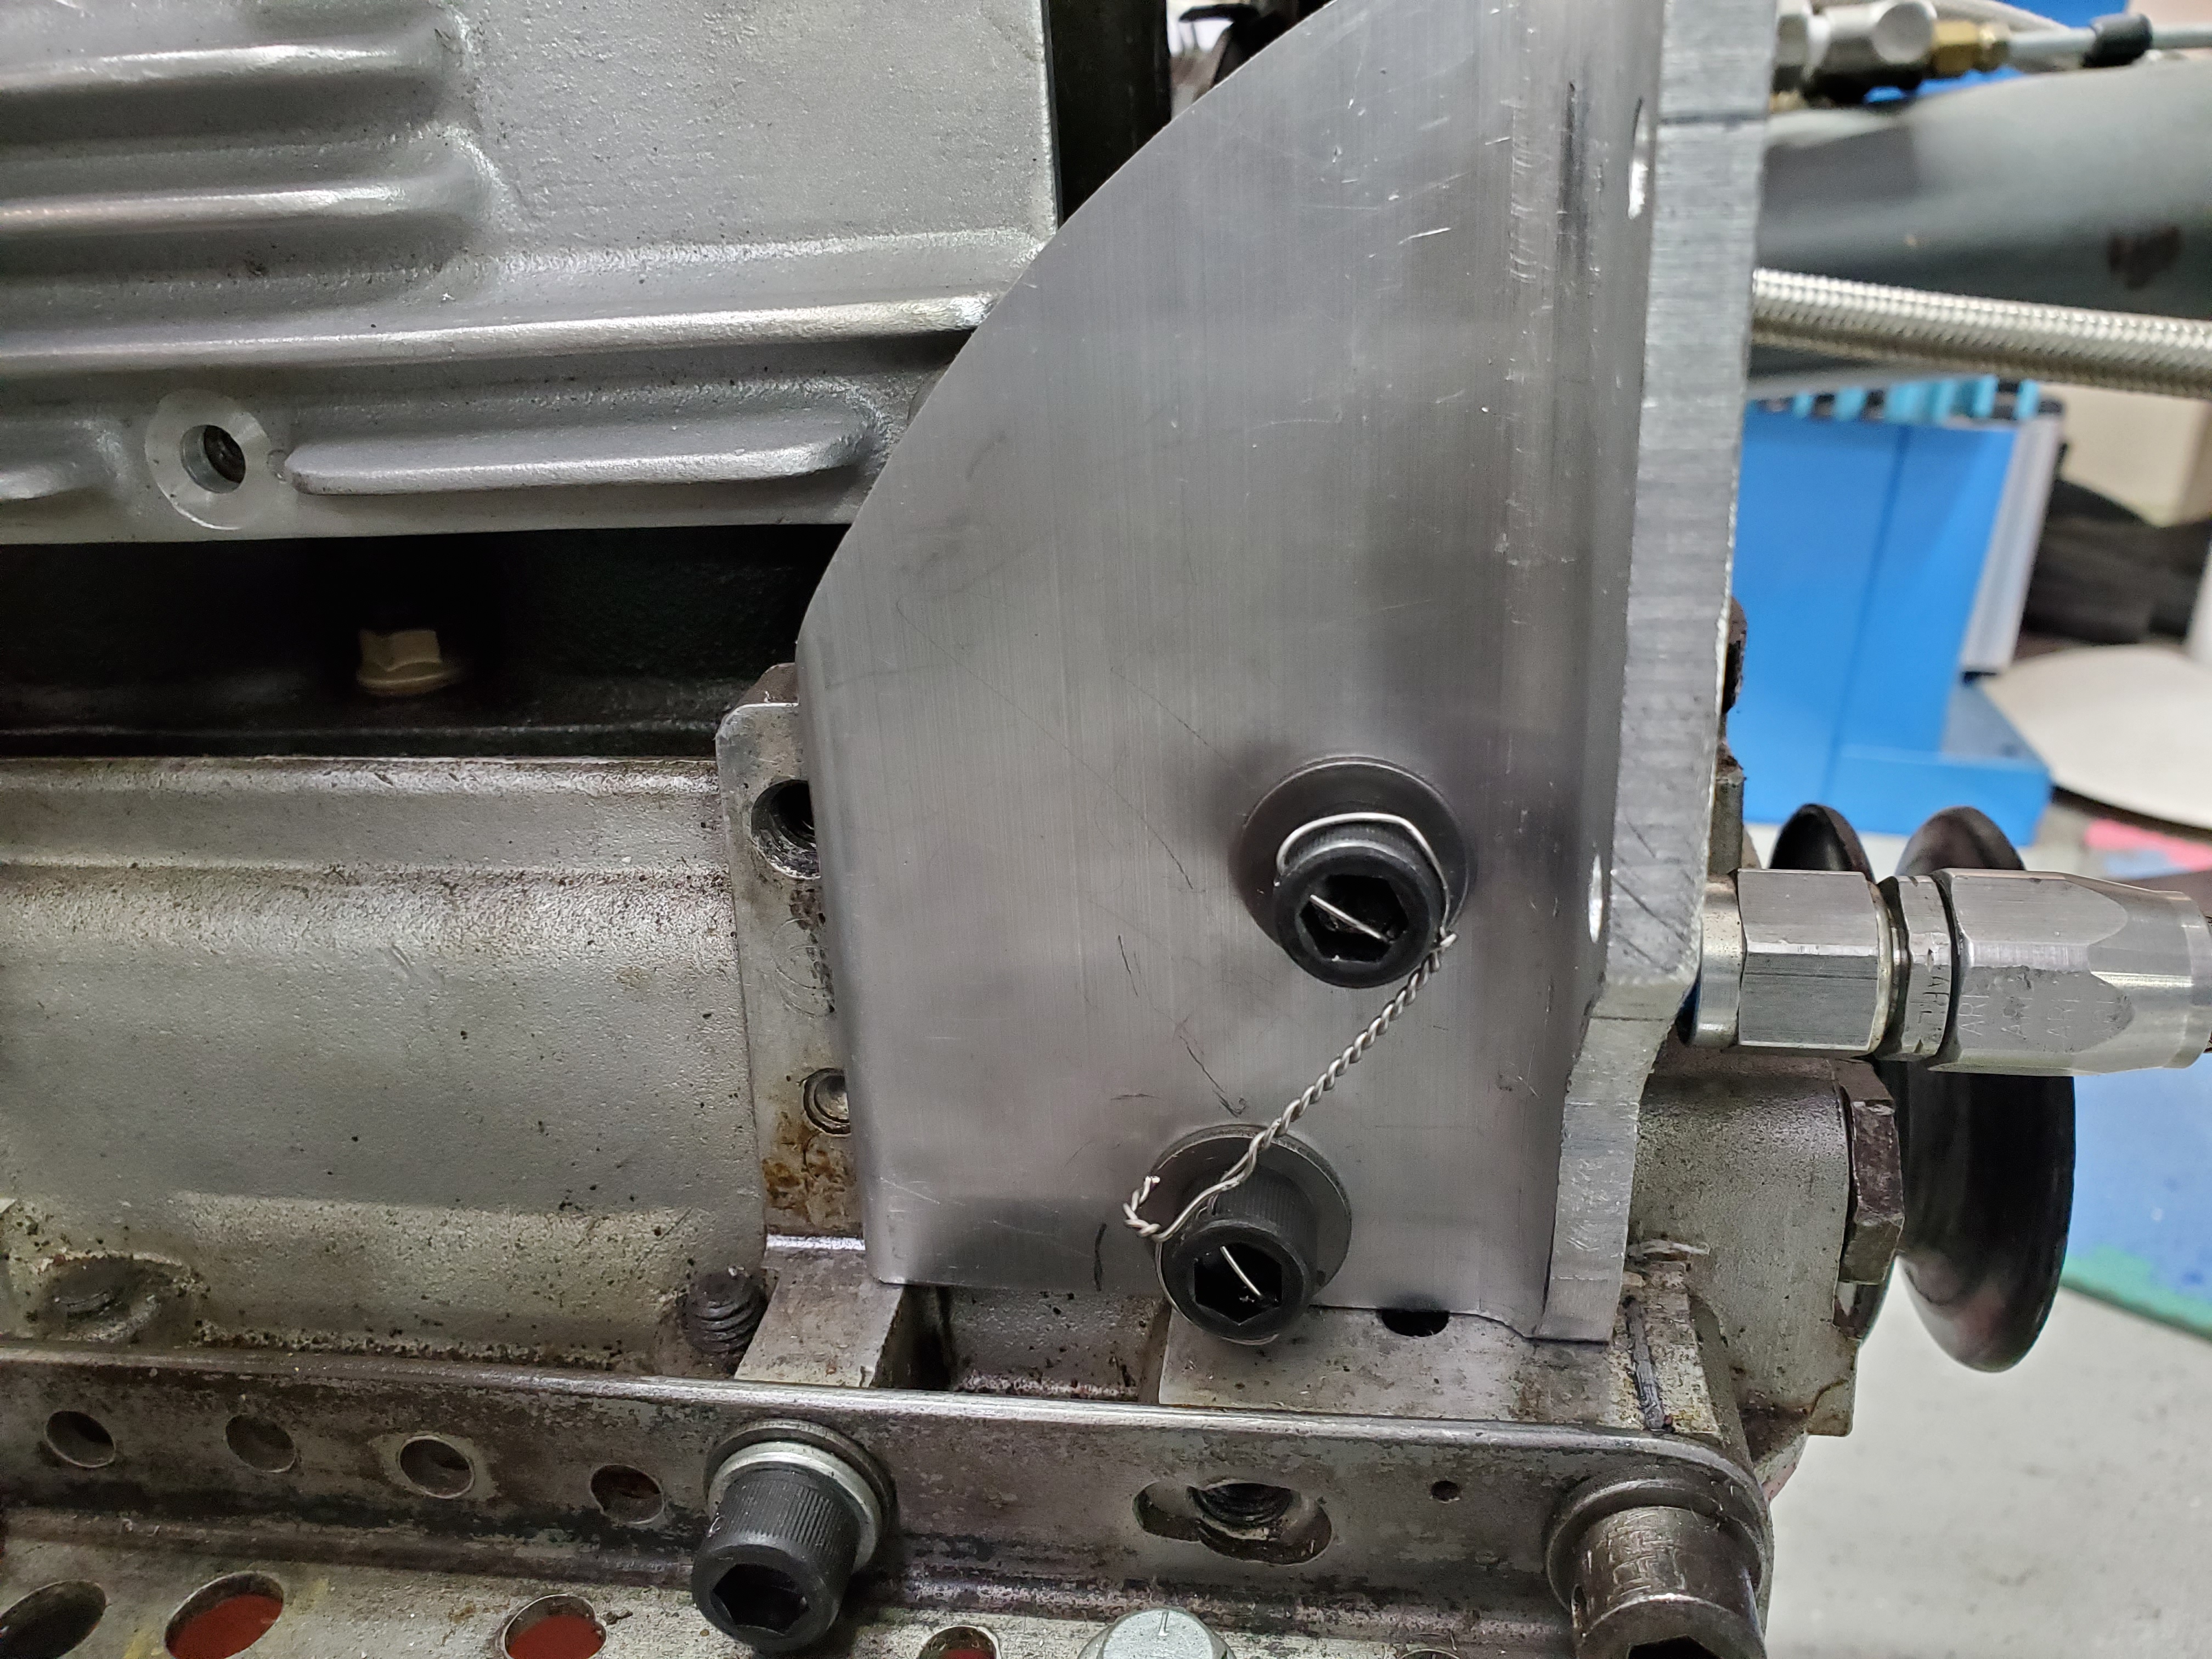
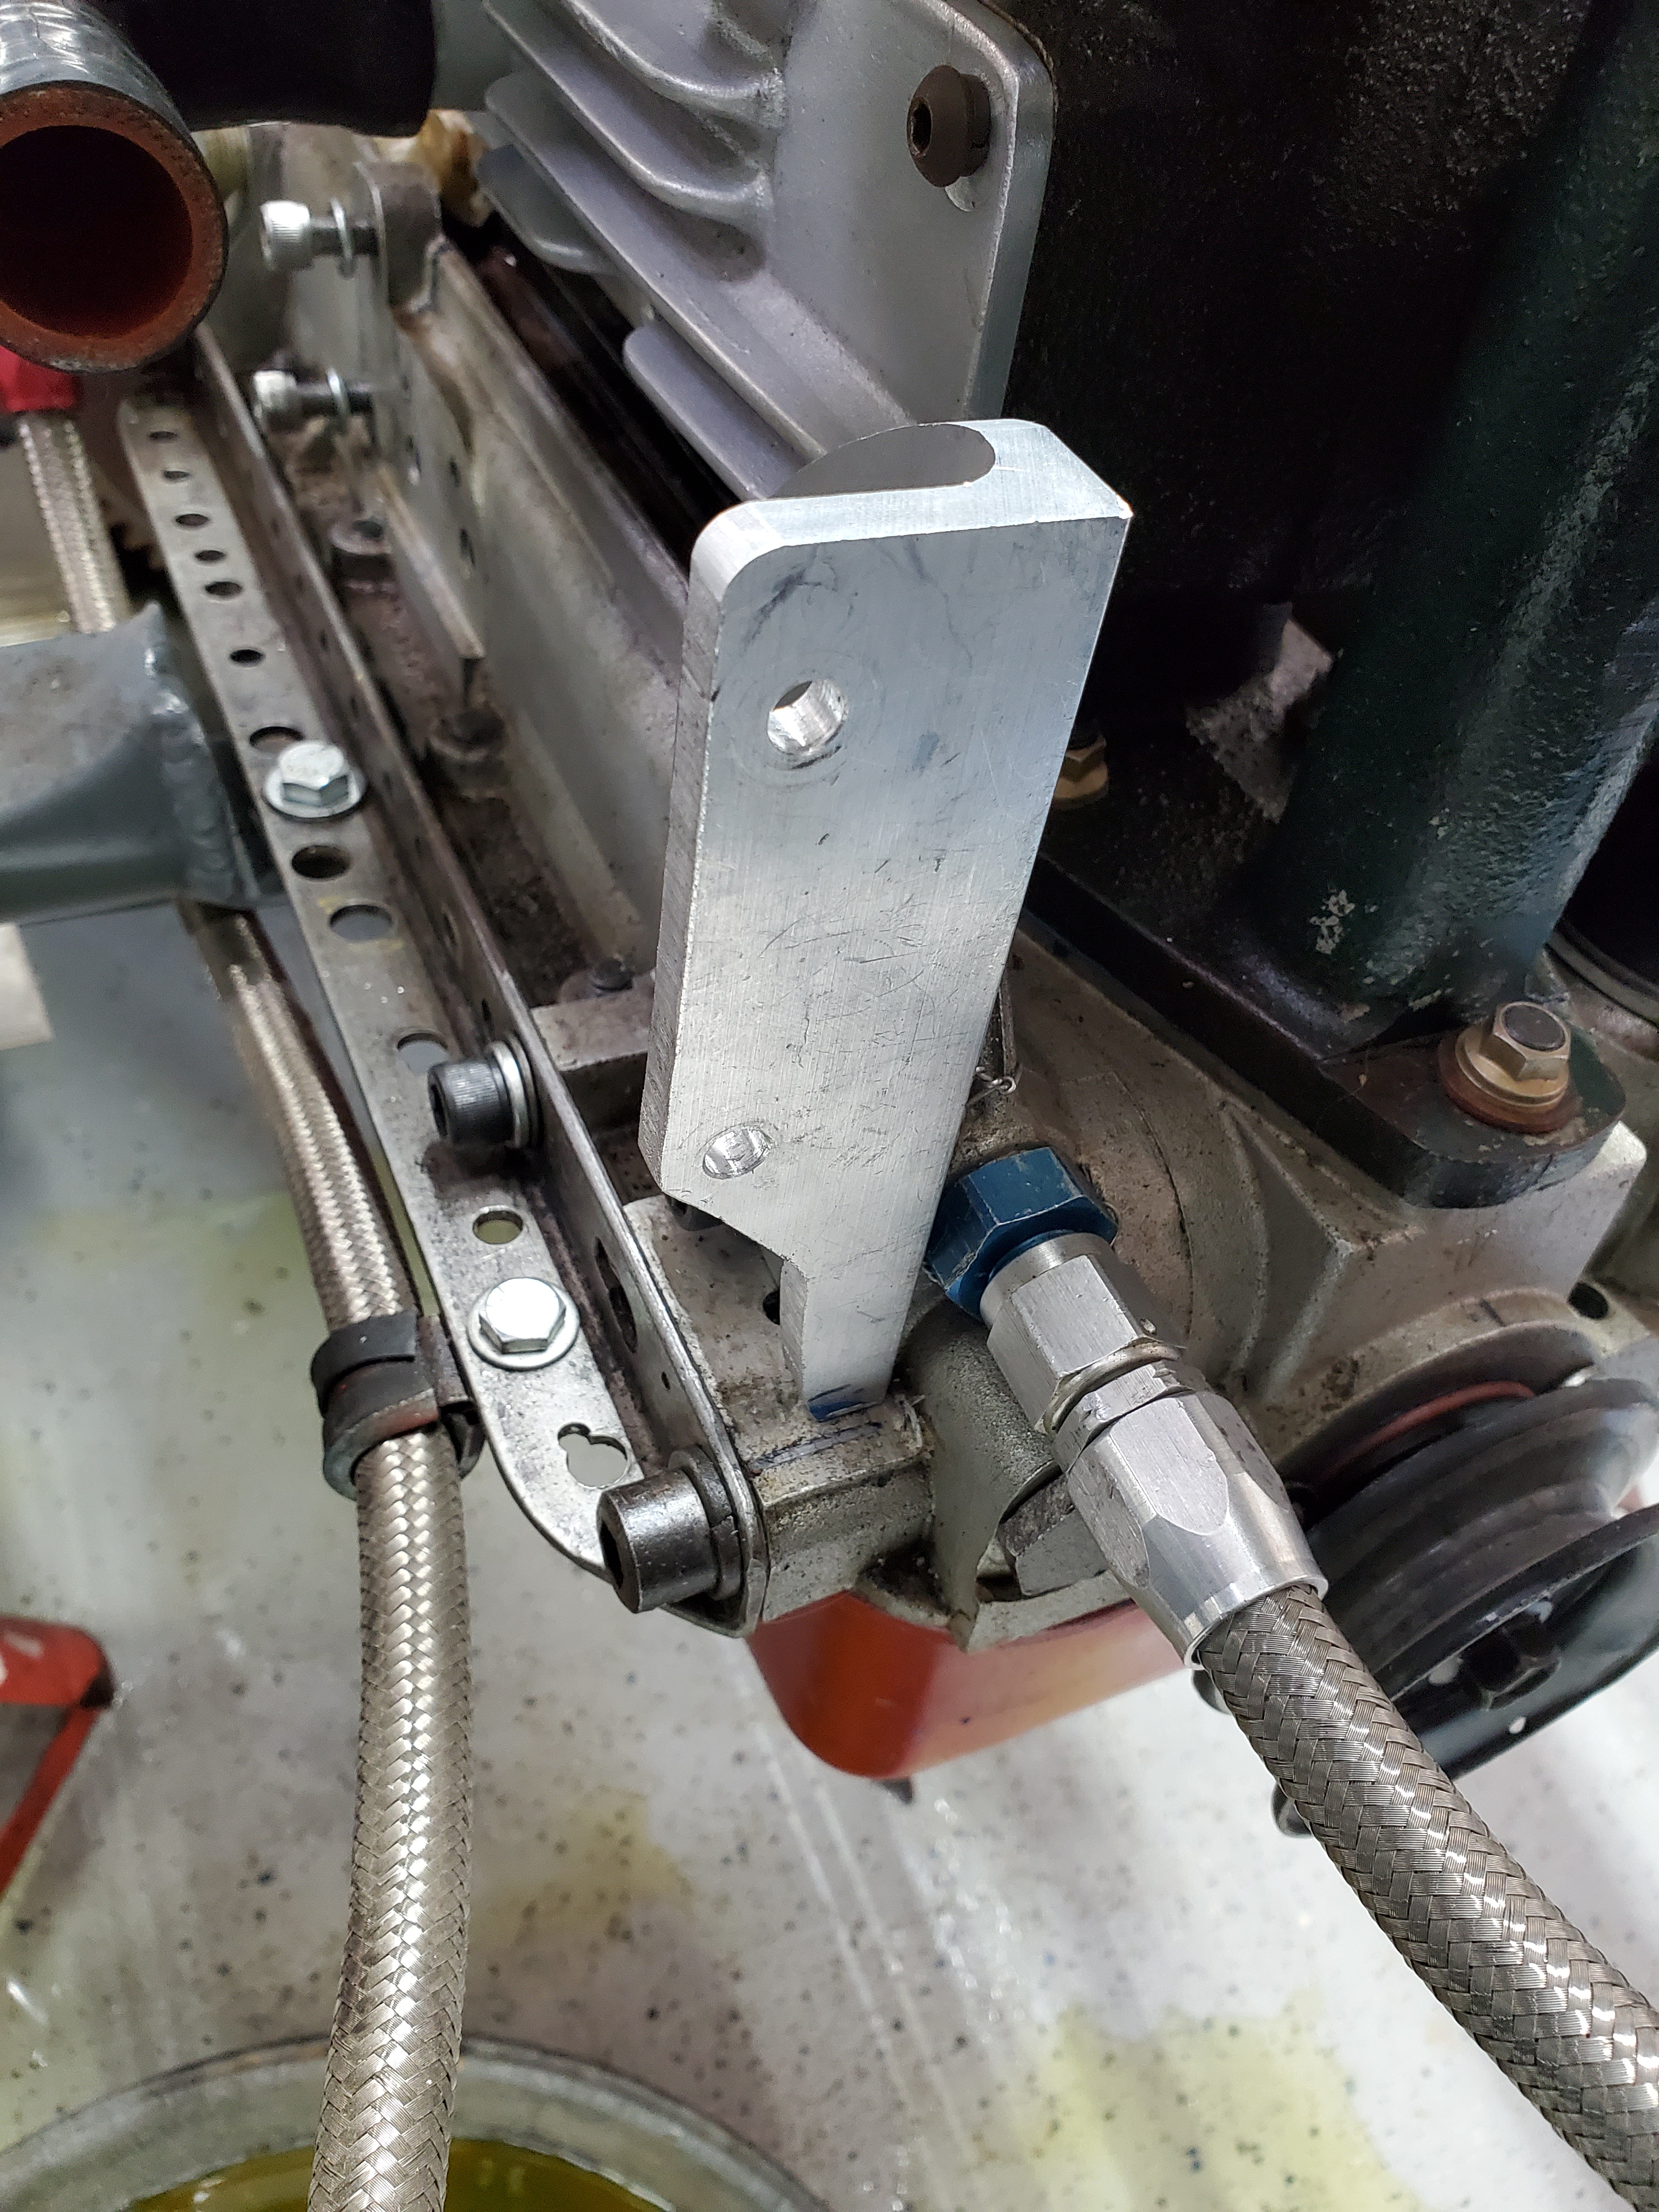
Next fabricated from 4″x4″ by 1/4″ thick Aluminum plate a backing plate for the water pump.  For my application I used 1 1/4″ diameter tube as the outlet to the Crosley engine.


I haven’t finished this yet so decided to publish interim steps.  Will edit once installed into SIAM.

Larry